Categories
Creator's Academy

Editor Showcase: VSCO

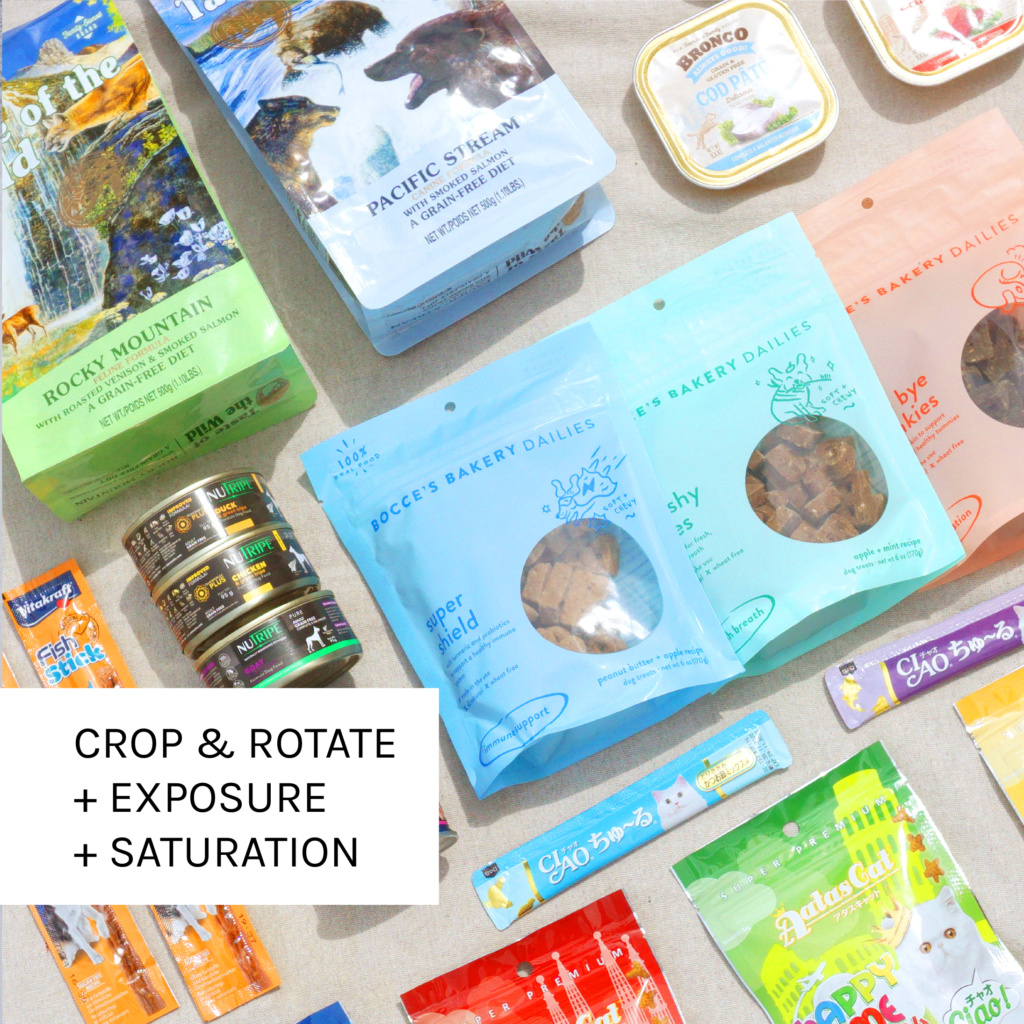
In our previous article, we covered four apps that you can use to edit your content for Instagram and TikTok. So today, I will be showing a quick demonstration of my favourite editing app, VSCO. While the app’s roots were grounded in photo-editing at first, VSCO has been steadily upgrading itself to keep up with Instagram’s new features. As of 2020, the app is now able to record and edit videos — along with various video effects and capture modes — through its “F X” feature.

VSCO is a free-to-download editing app with powerful basic presets for photos. However, by subscribing to the app’s membership (either monthly/annual), you will gain access to its limited-time presets, premium video effects, and more. The app also detracts from the whimsical stickers and animations of other photo-editing apps, instead, doubling down on VSCO’s thematic style: Emulating the look of film and old cameras.

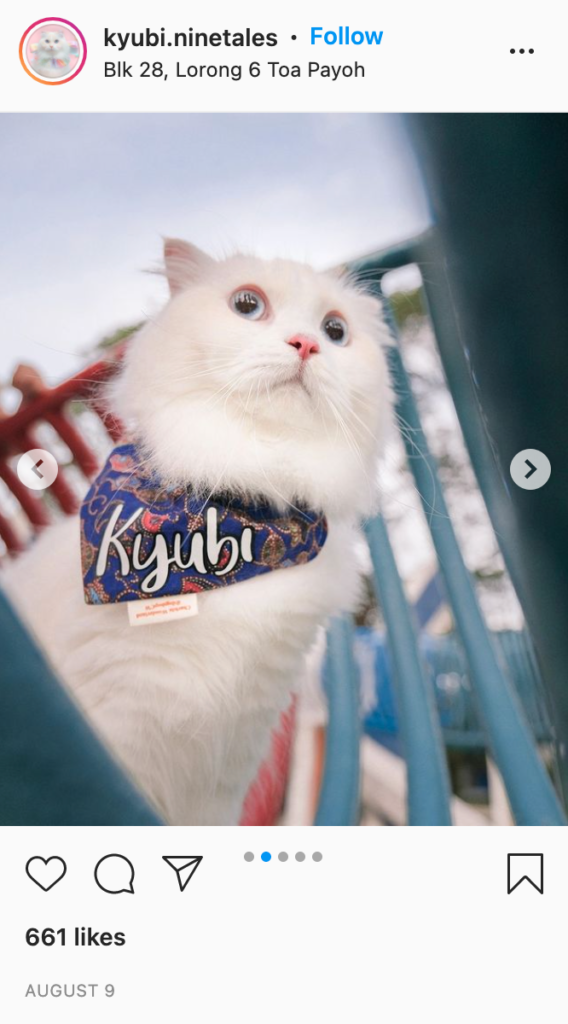
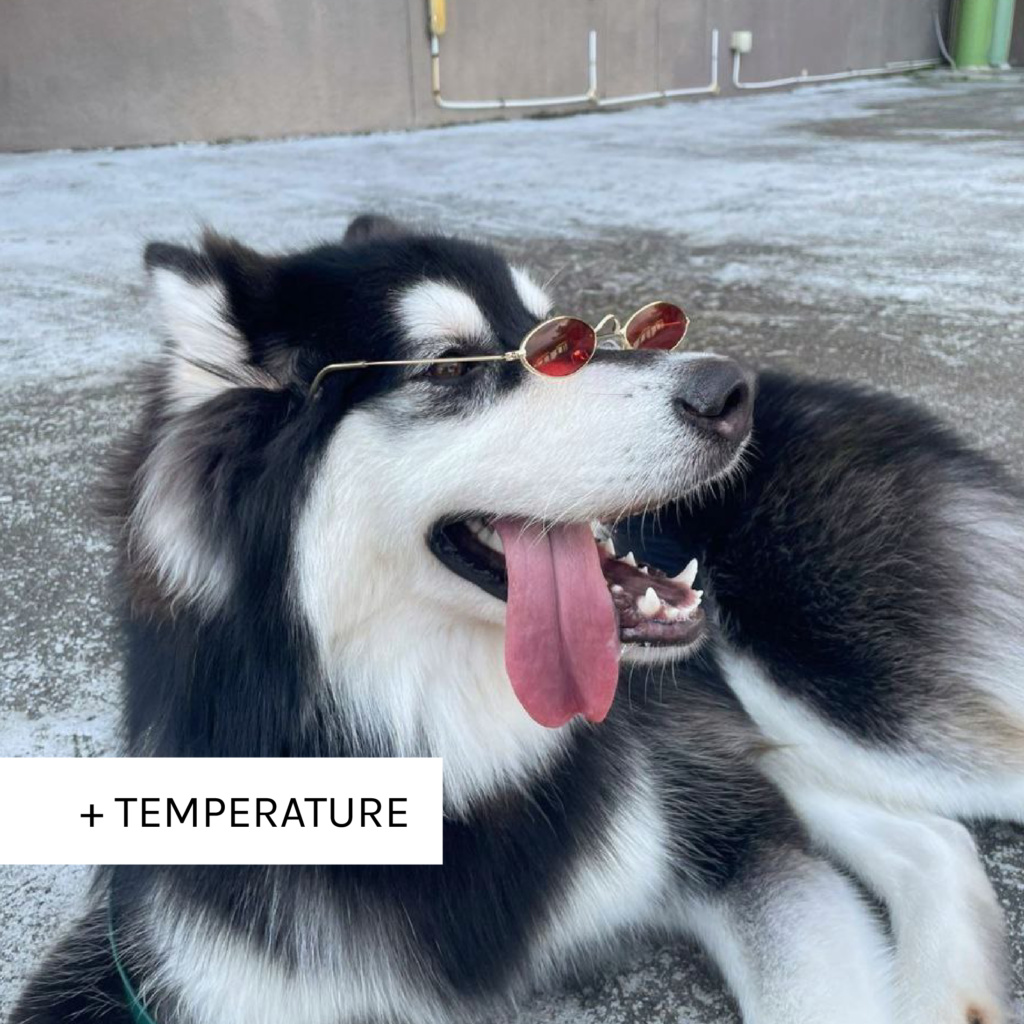
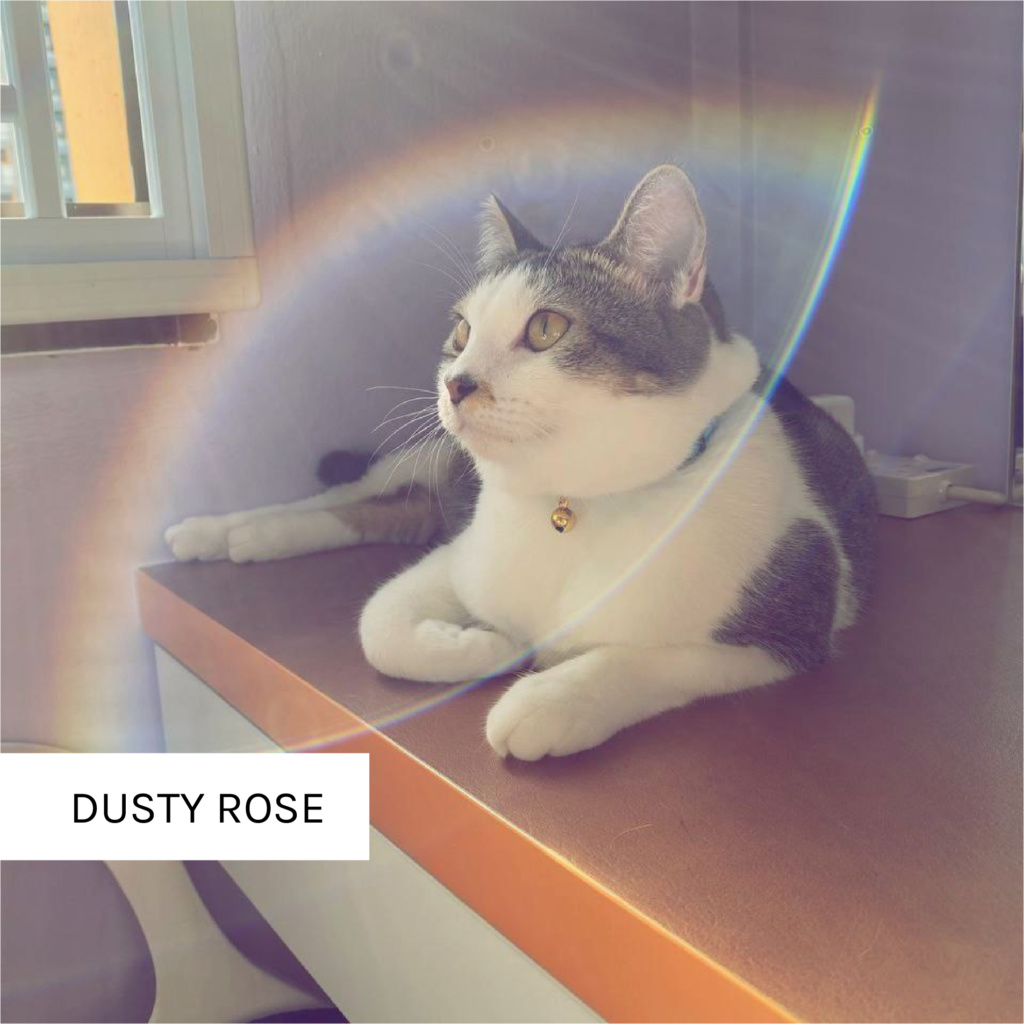
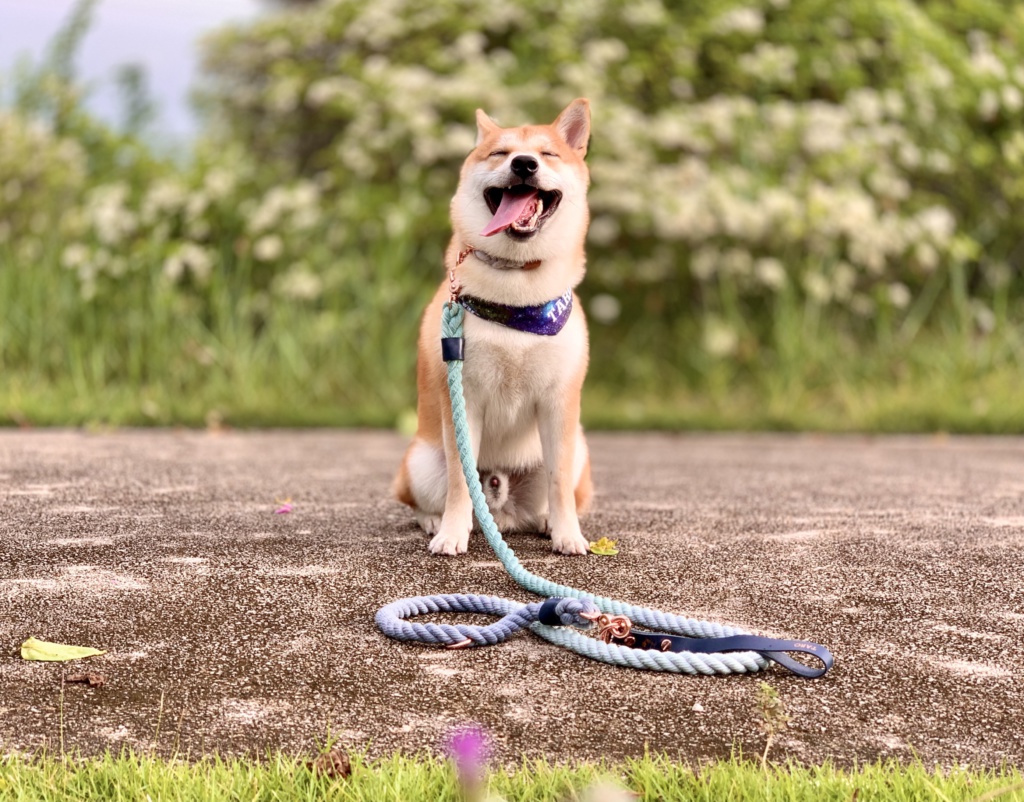
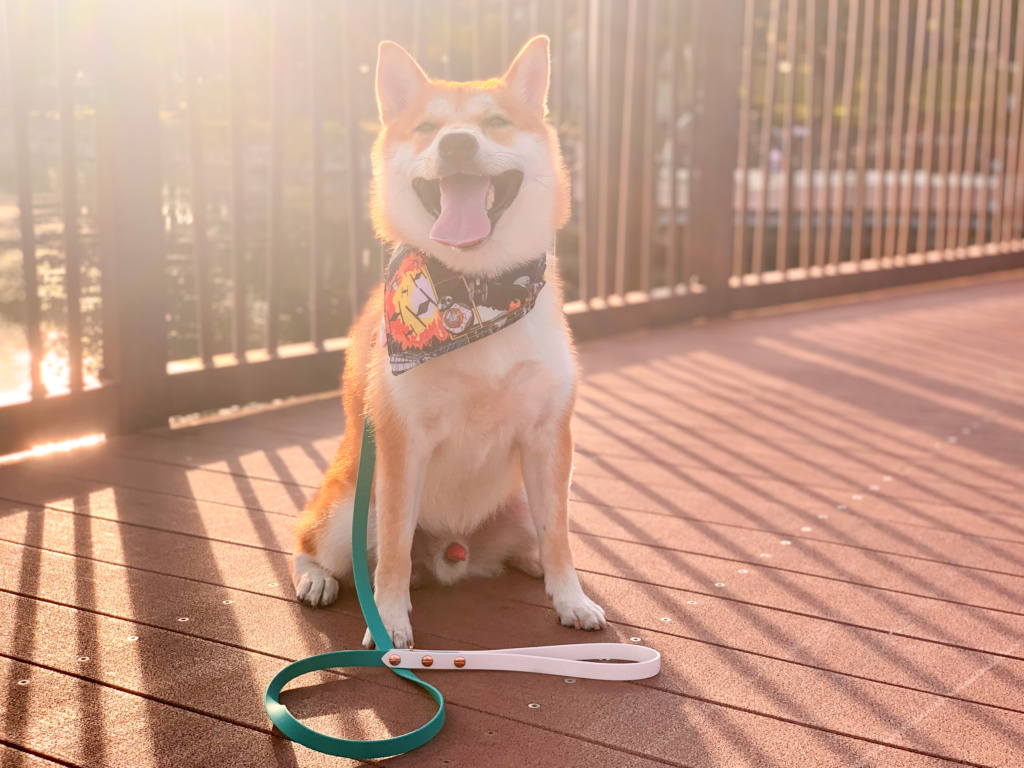
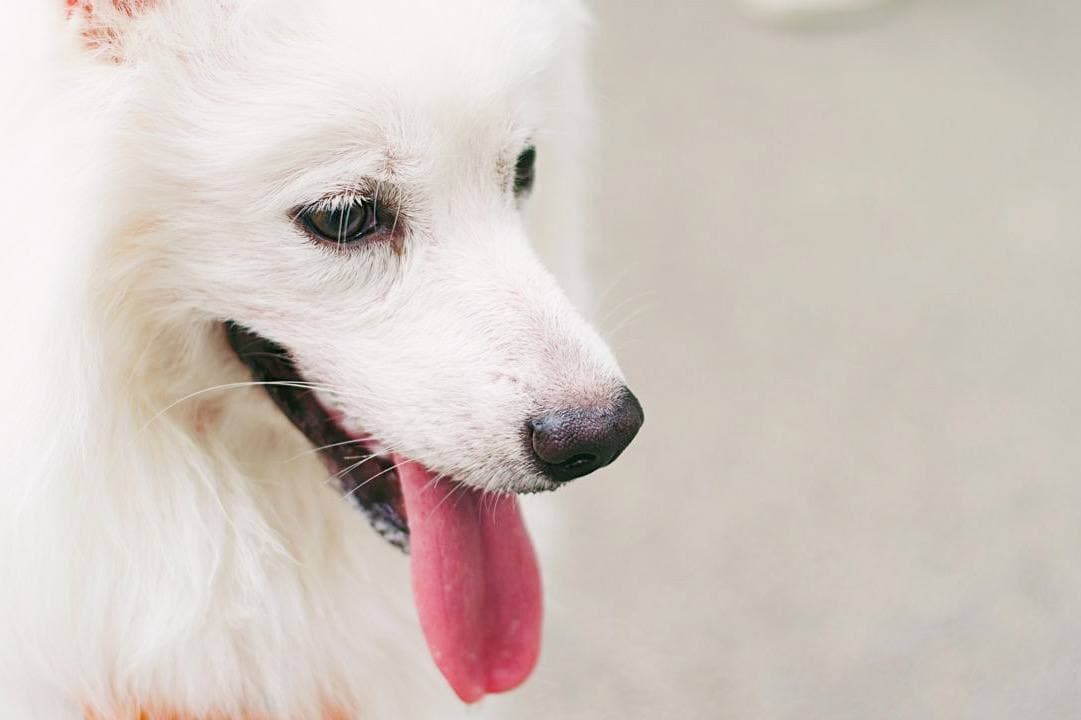
Bright & Clean / S Series

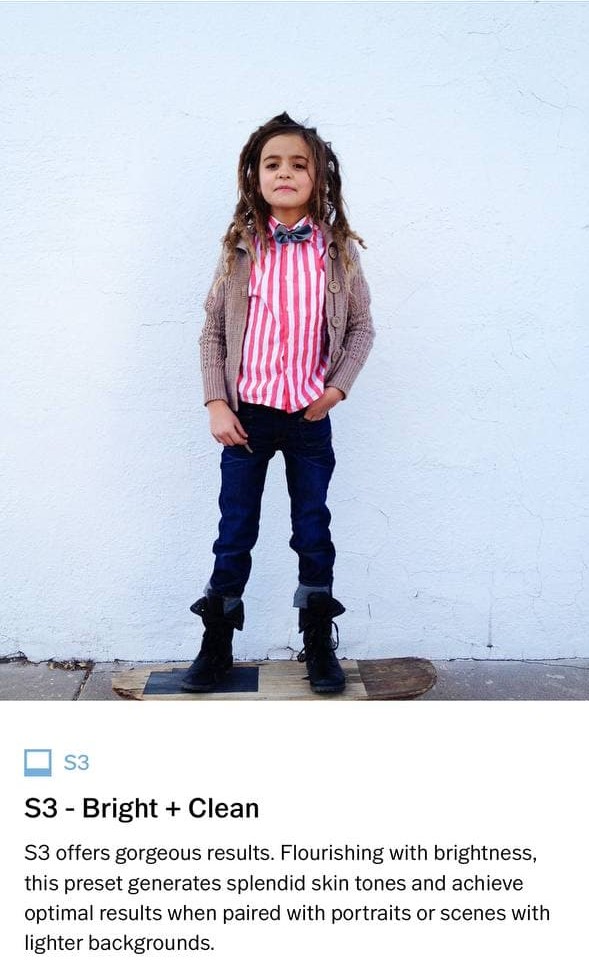
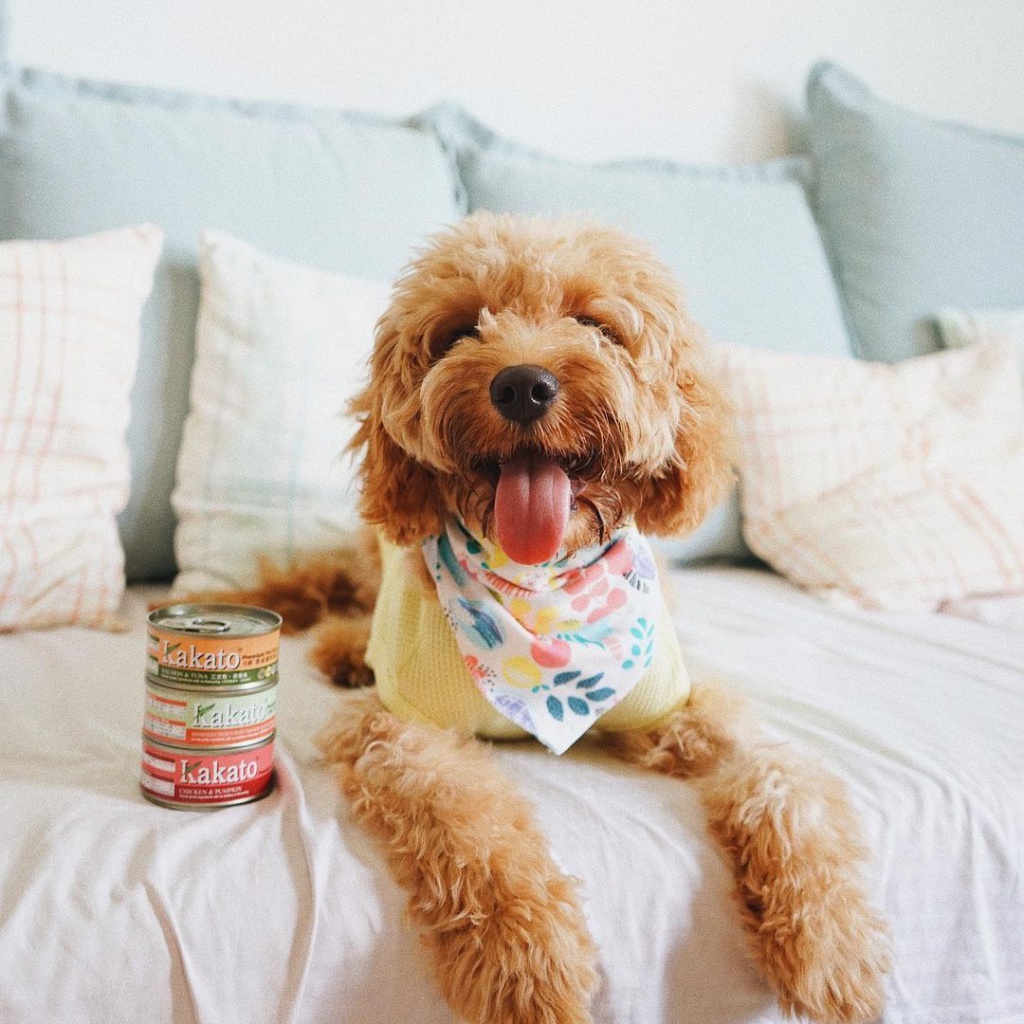
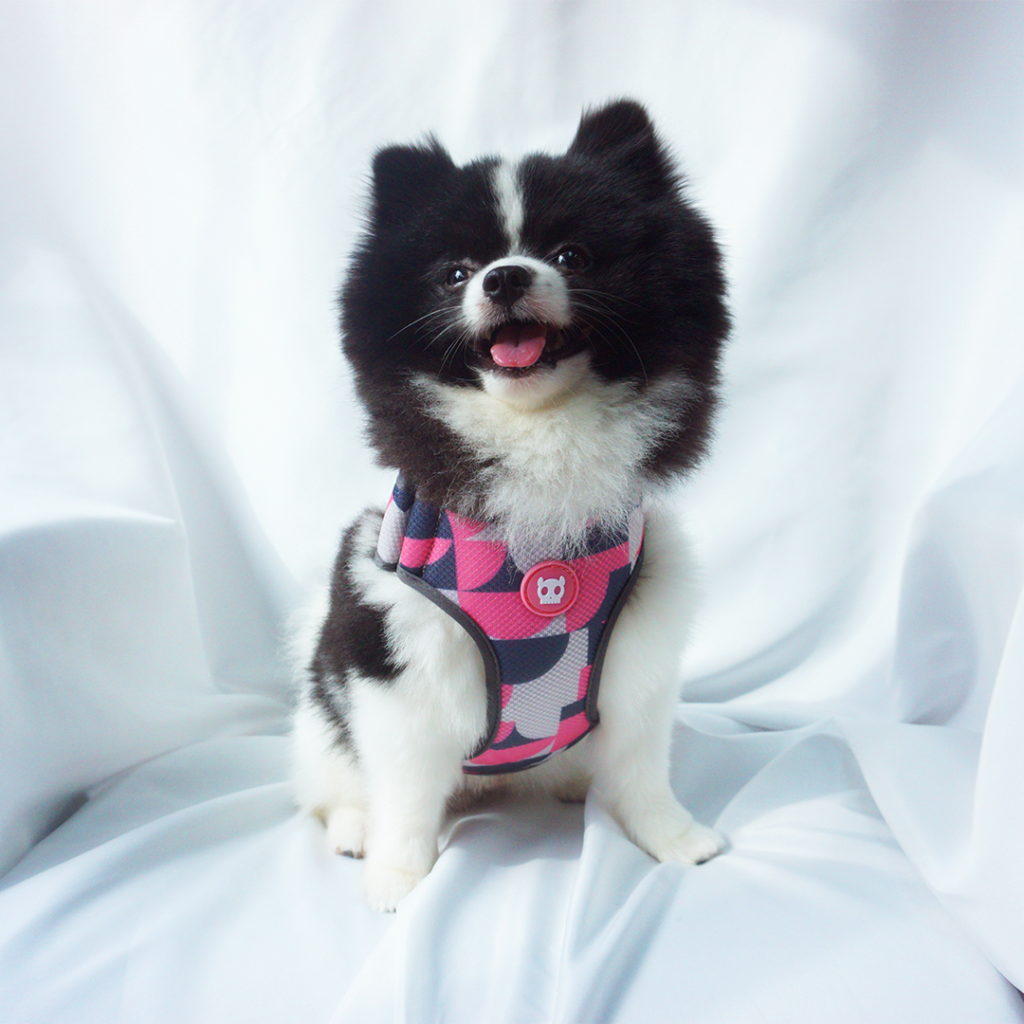
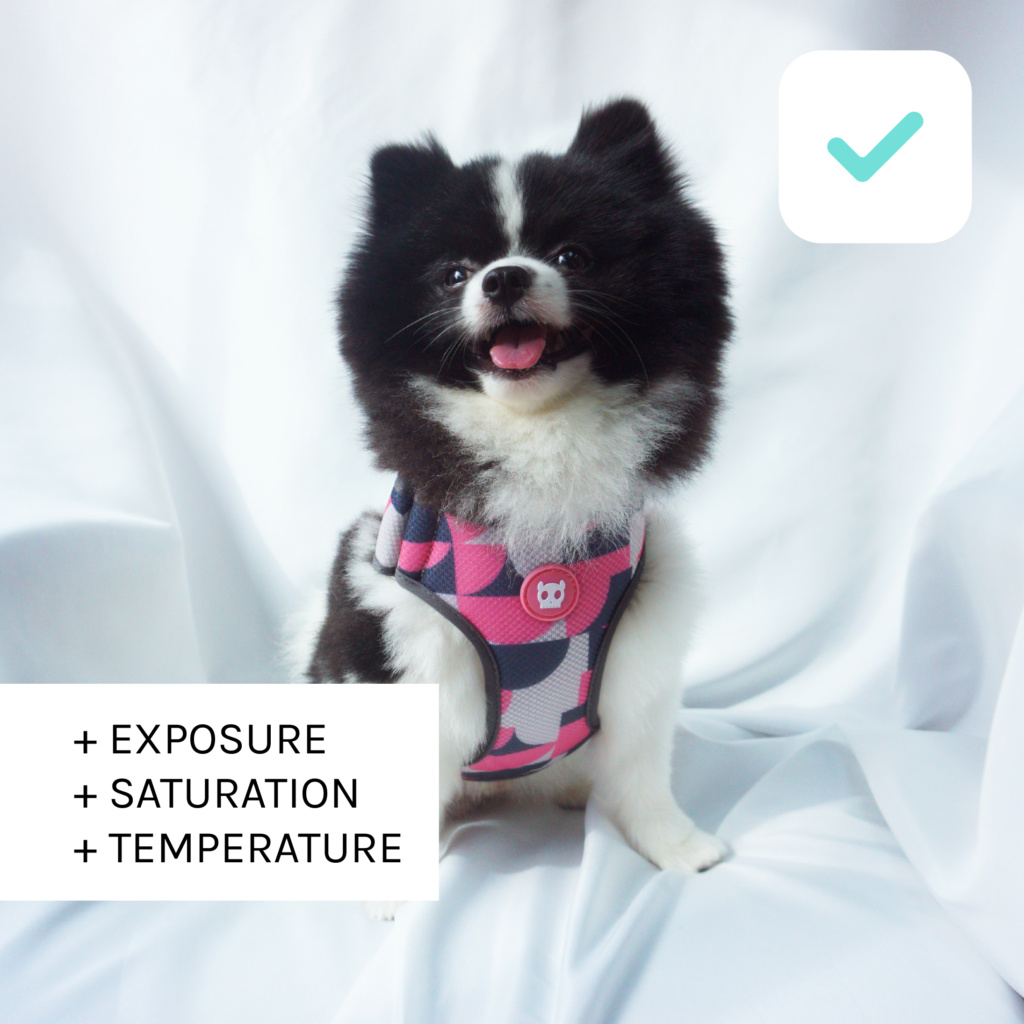
The S series emphasises skin tones and works well with portraits. A favourite of mine, the series balances colour contrasts to give photos a softer, more natural look.

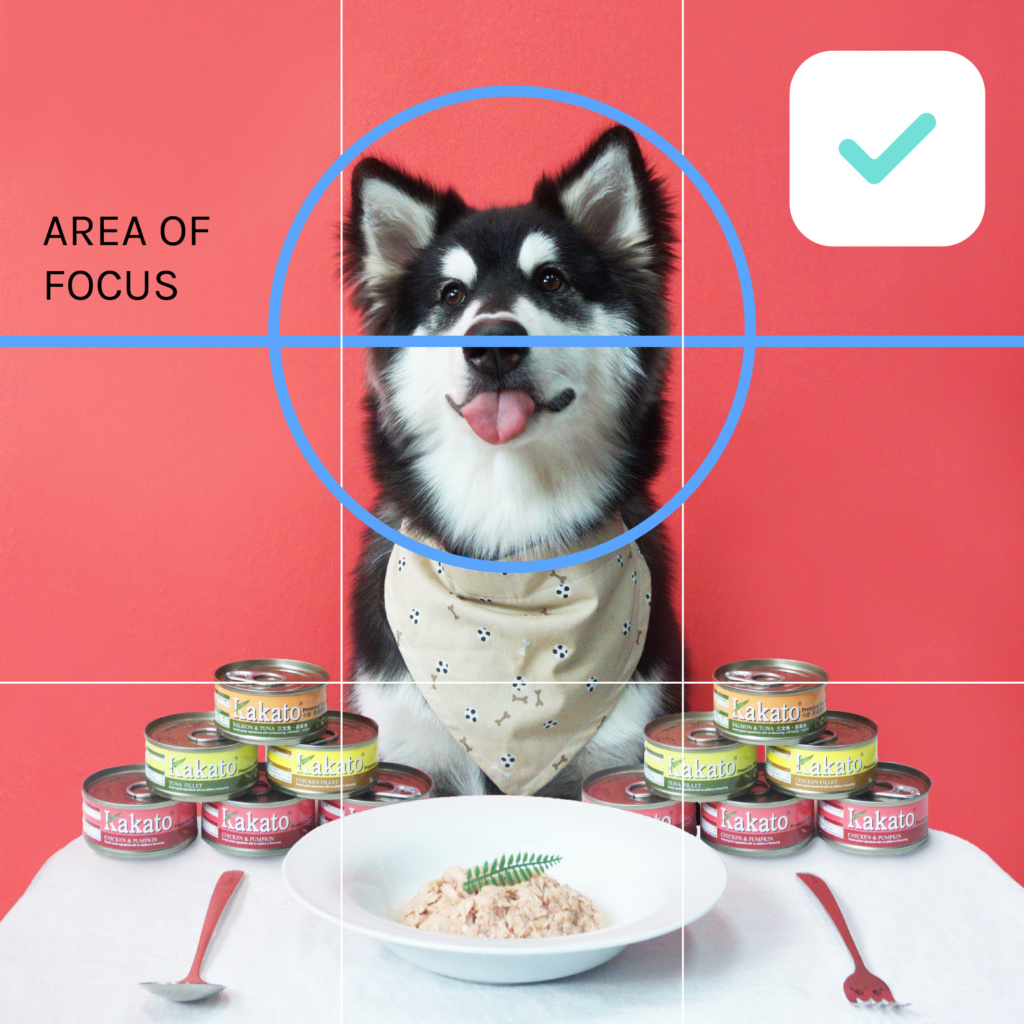
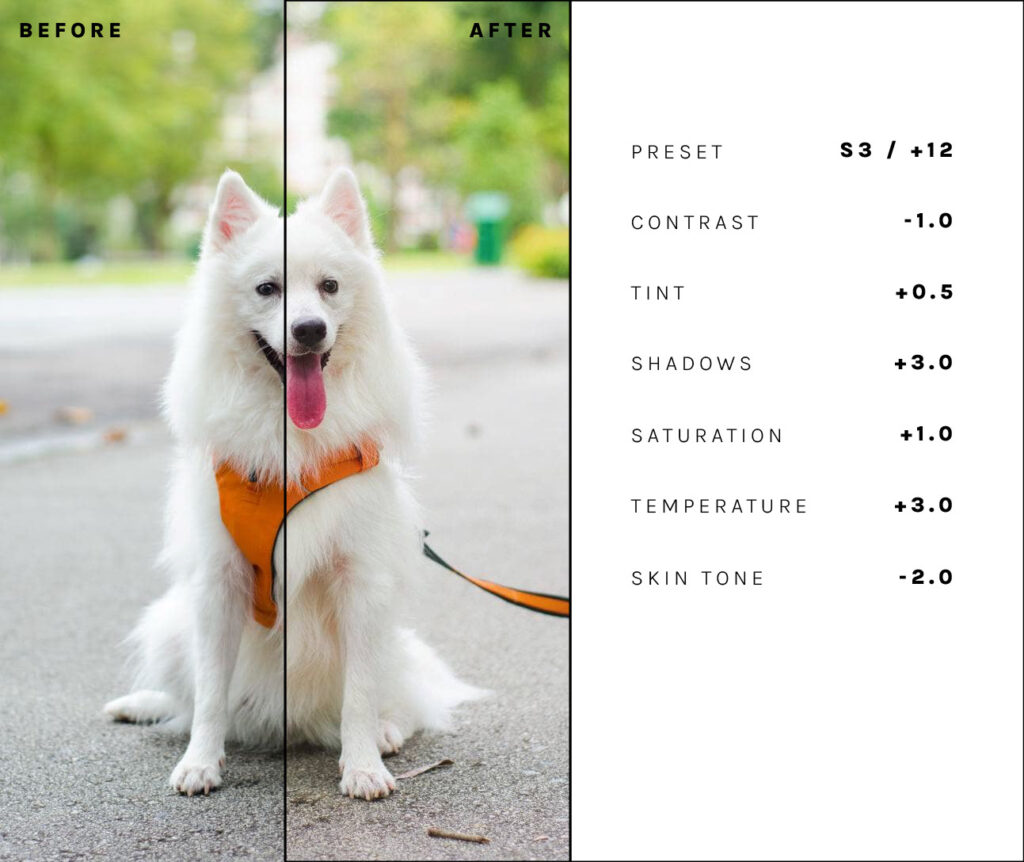
For this photo, I reduced the shadows to take attention away from the background, as well as to highlight ZaiZai’s white fur. I also bumped up the temperature and saturation to give his tongue a healthy pinkish tone.
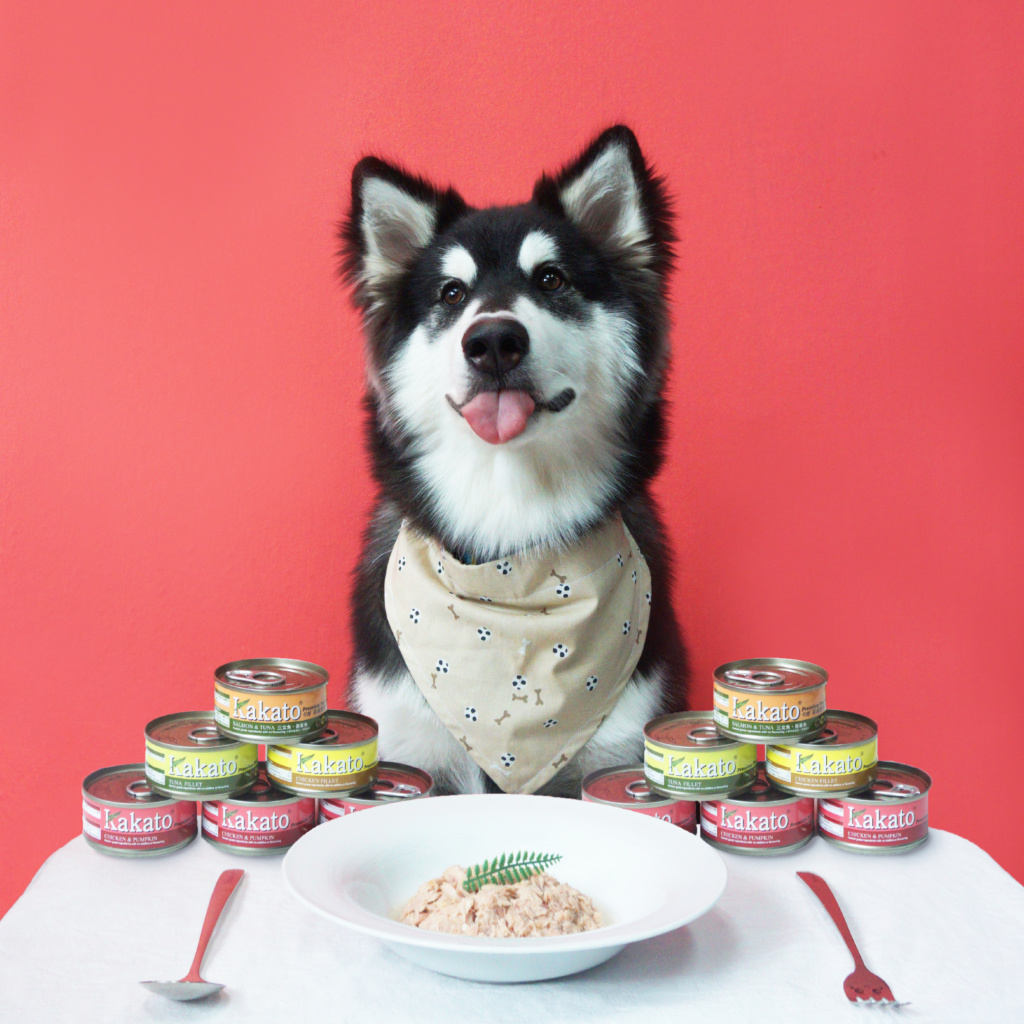
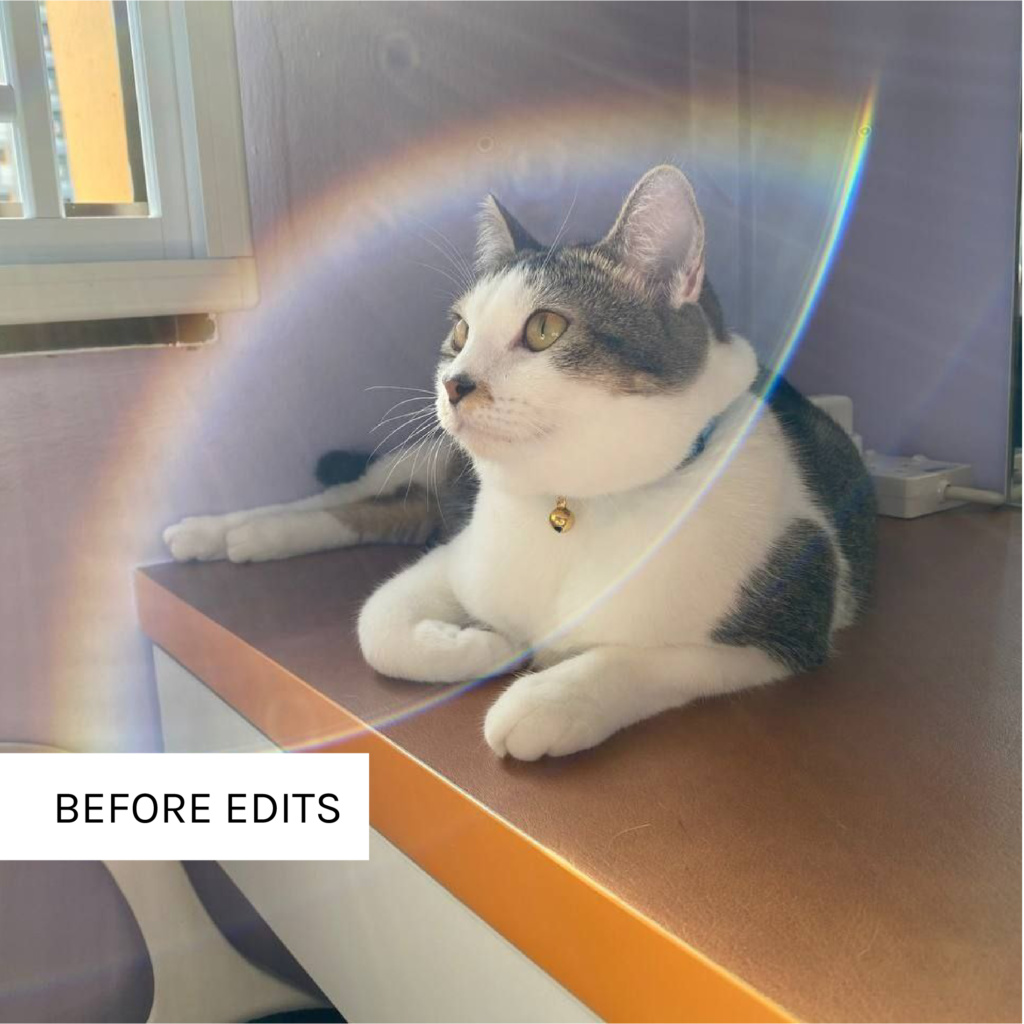
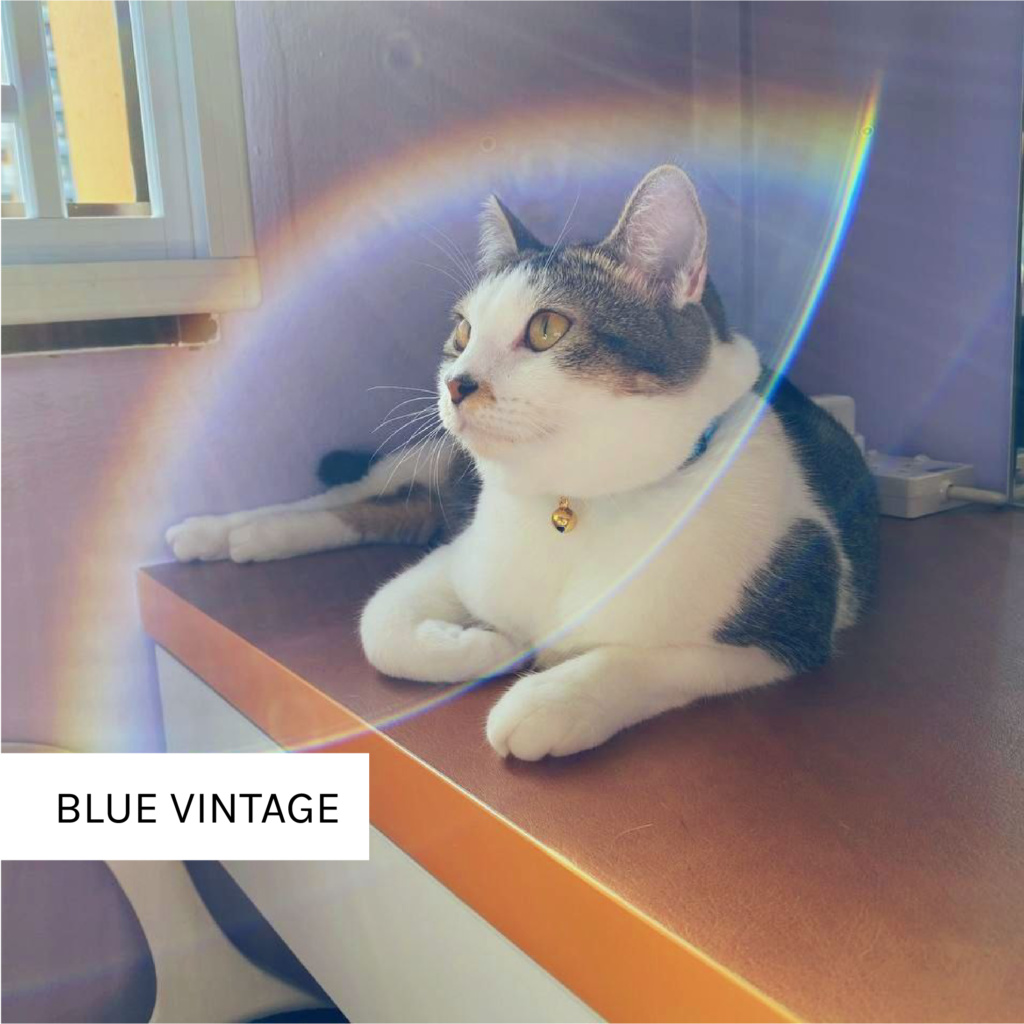
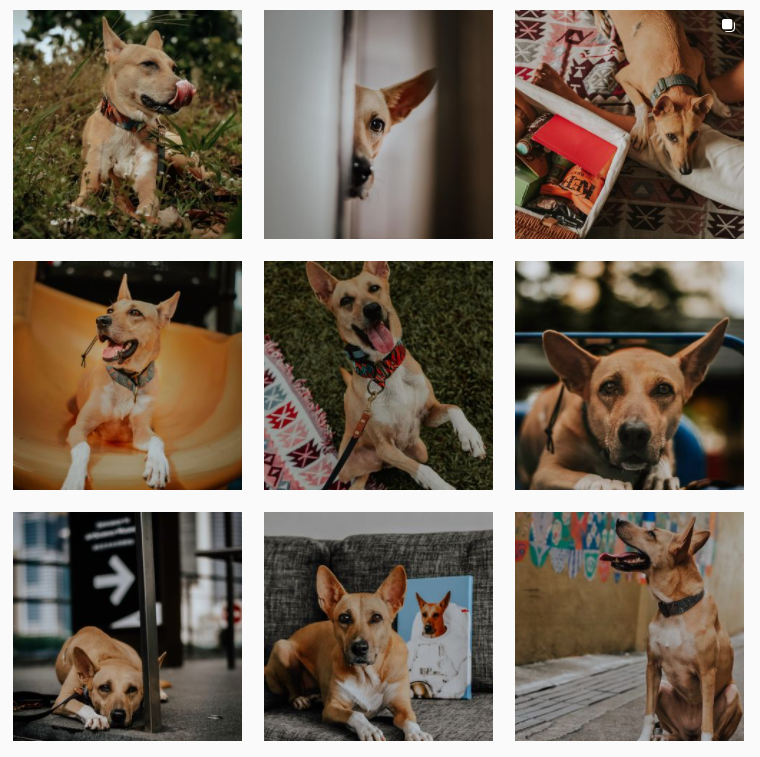
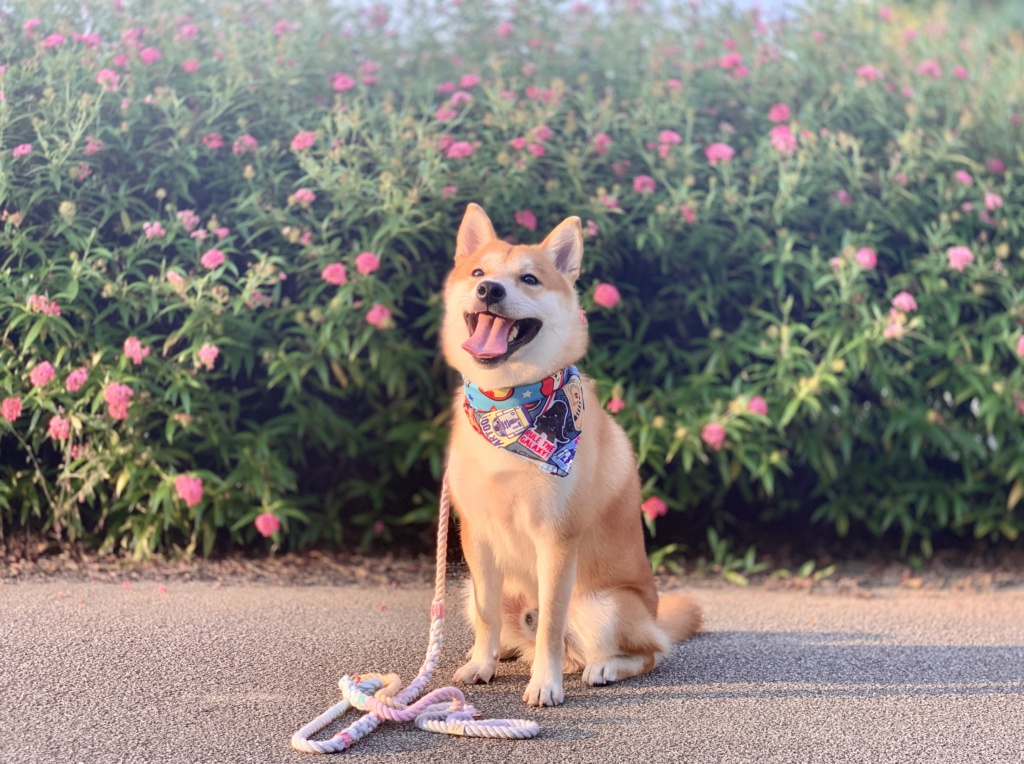
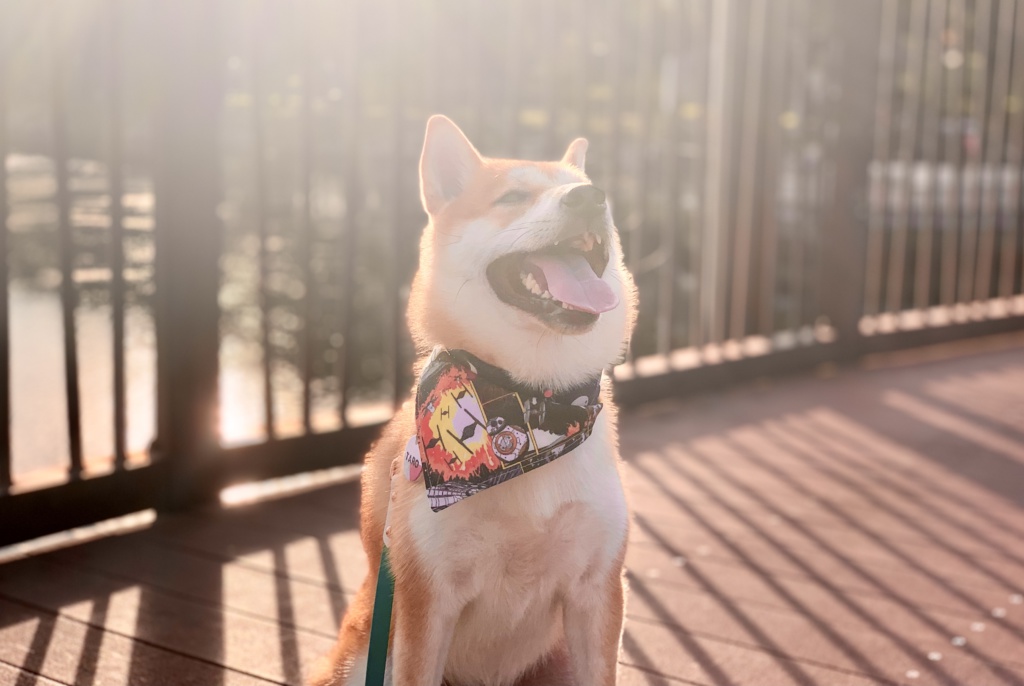
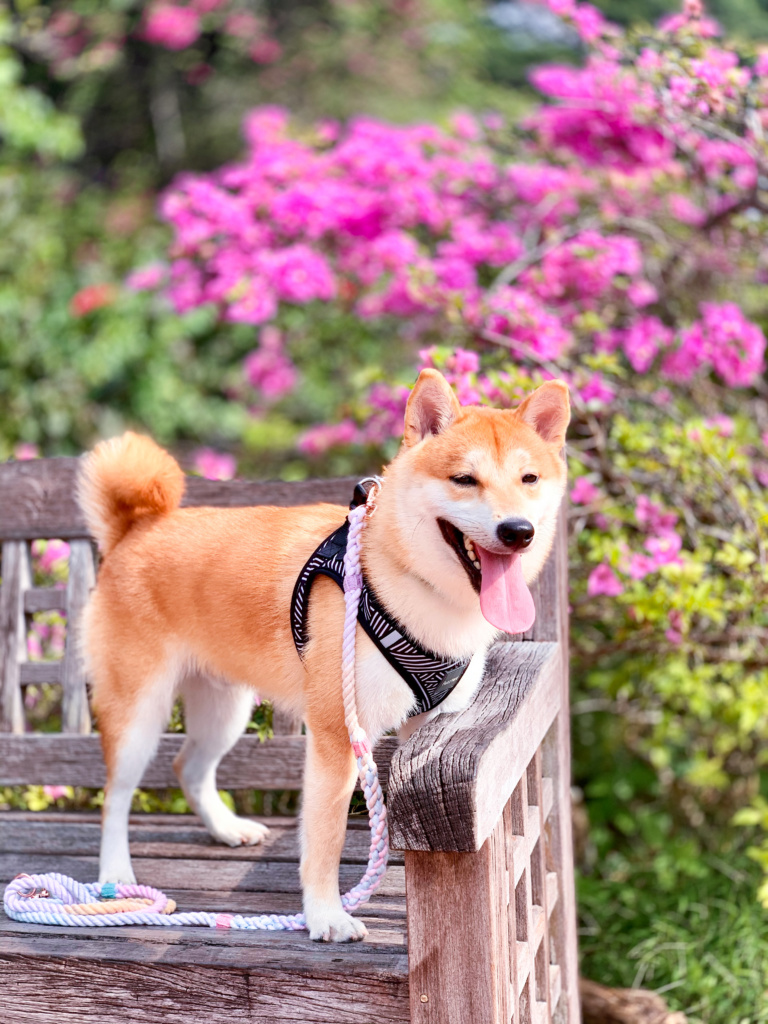
Analog / A Series

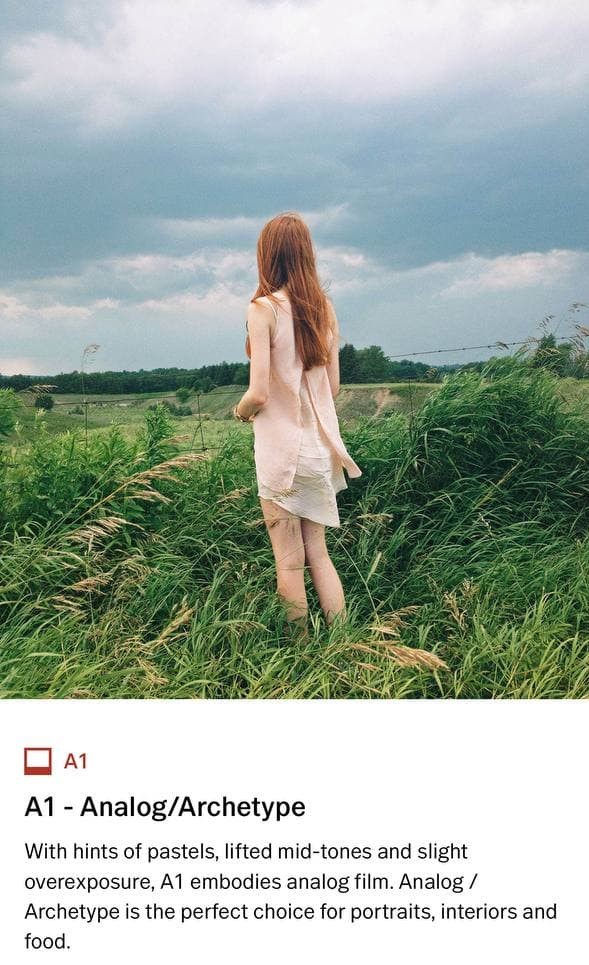
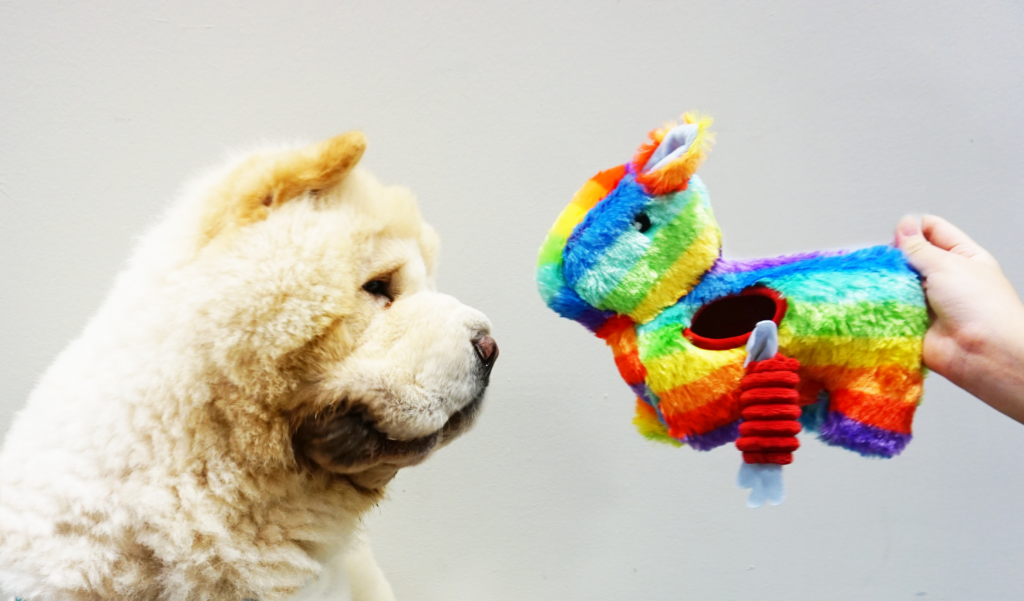
The A Series, inspired by analogue film, beautifully enhances the colour of your photos with their bright mid-tones and brighter highlights. I tend to use presets from the A Series (among many others) for outdoor photos.

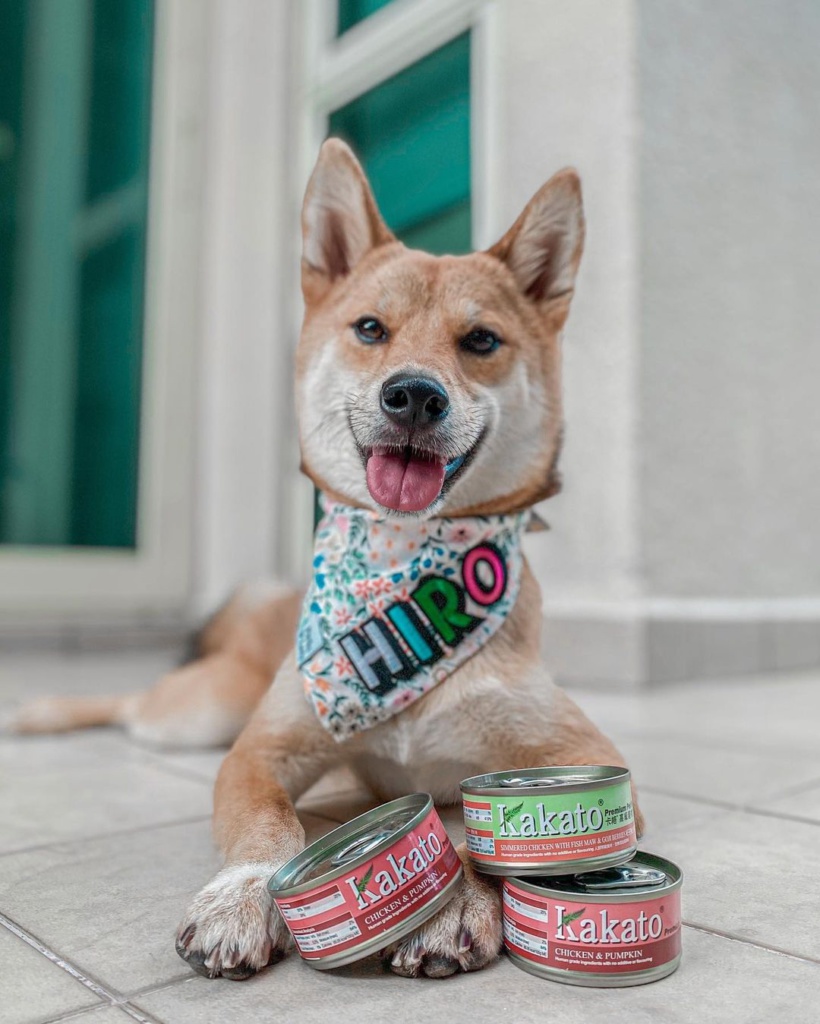
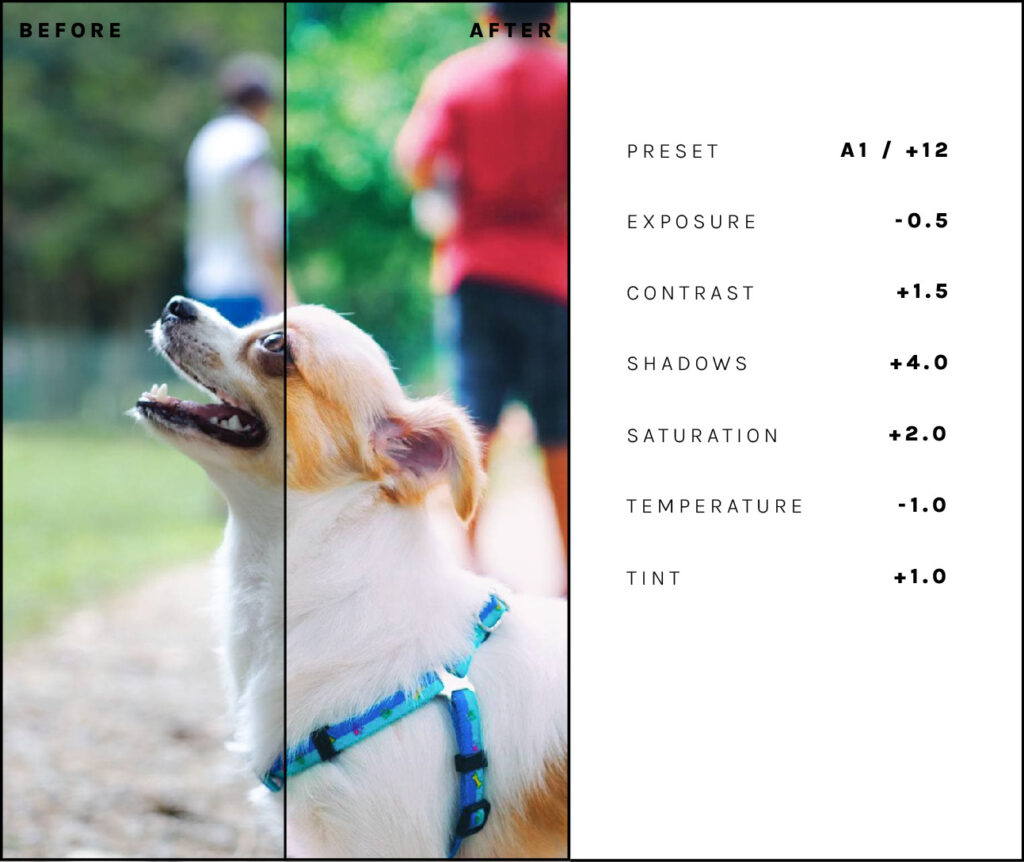
Momo has a clean white coat with beautiful brown patches. By increasing the contrast and reducing the shadows, his white and golden brown fur is accentuated. On top of that, the silver lining that forms when the sunlight shone behind is further amplified to create a pristine silhouette.
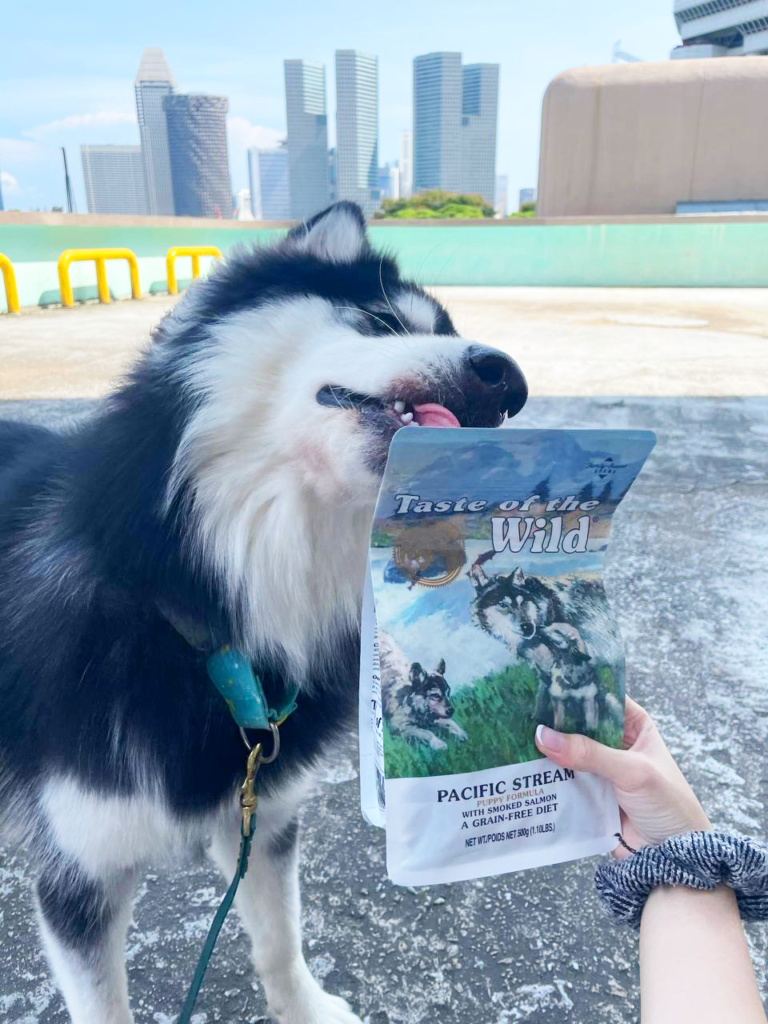
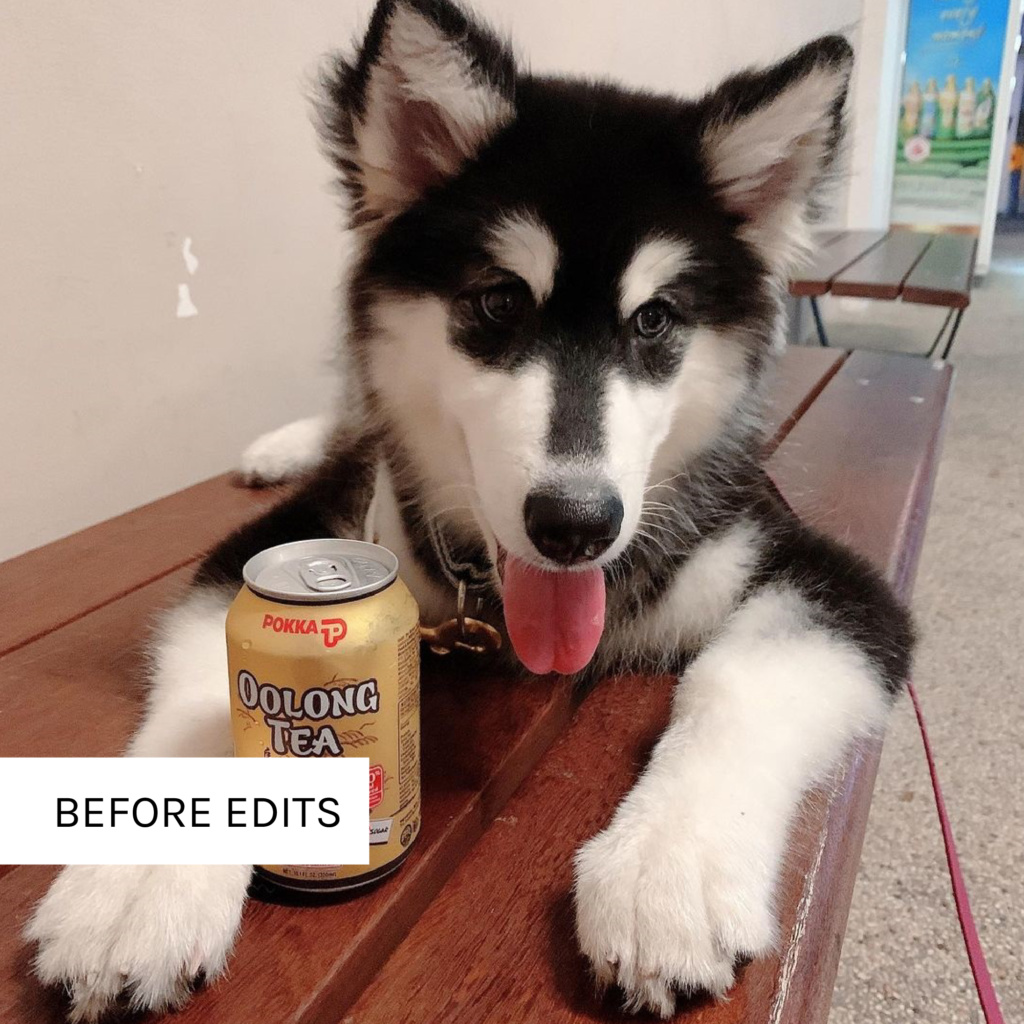
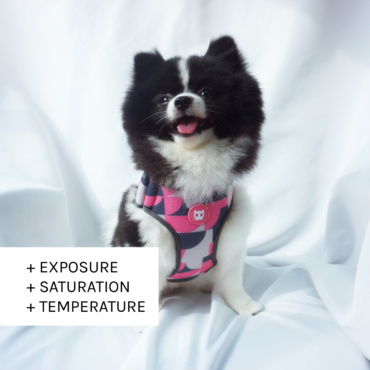
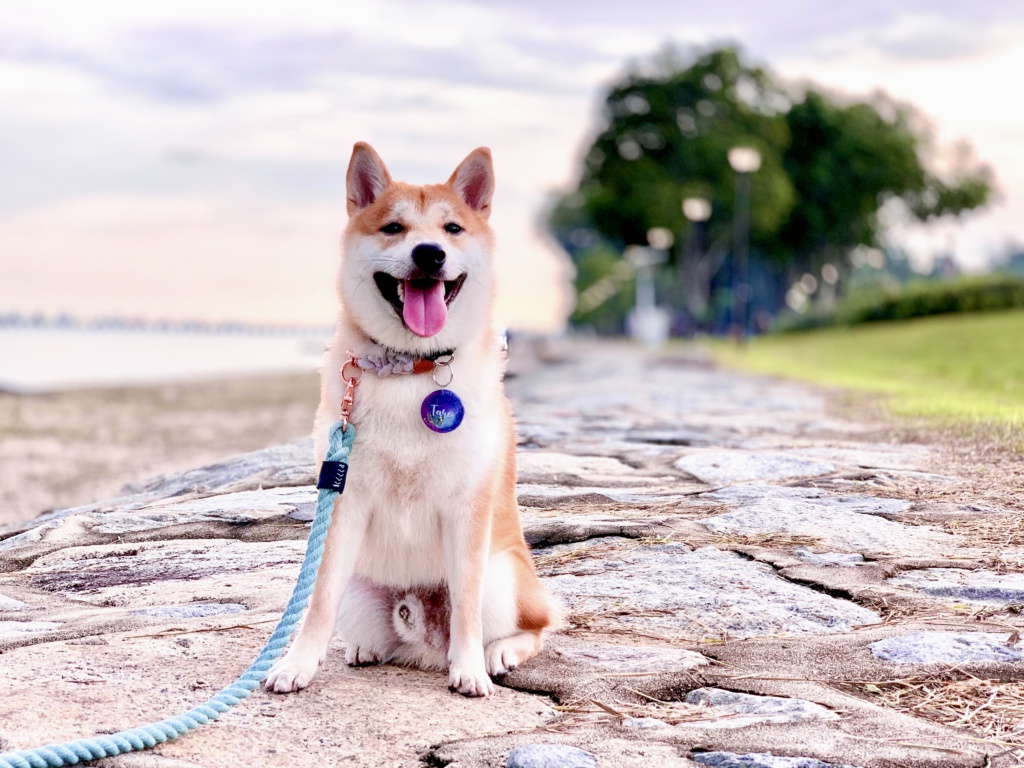
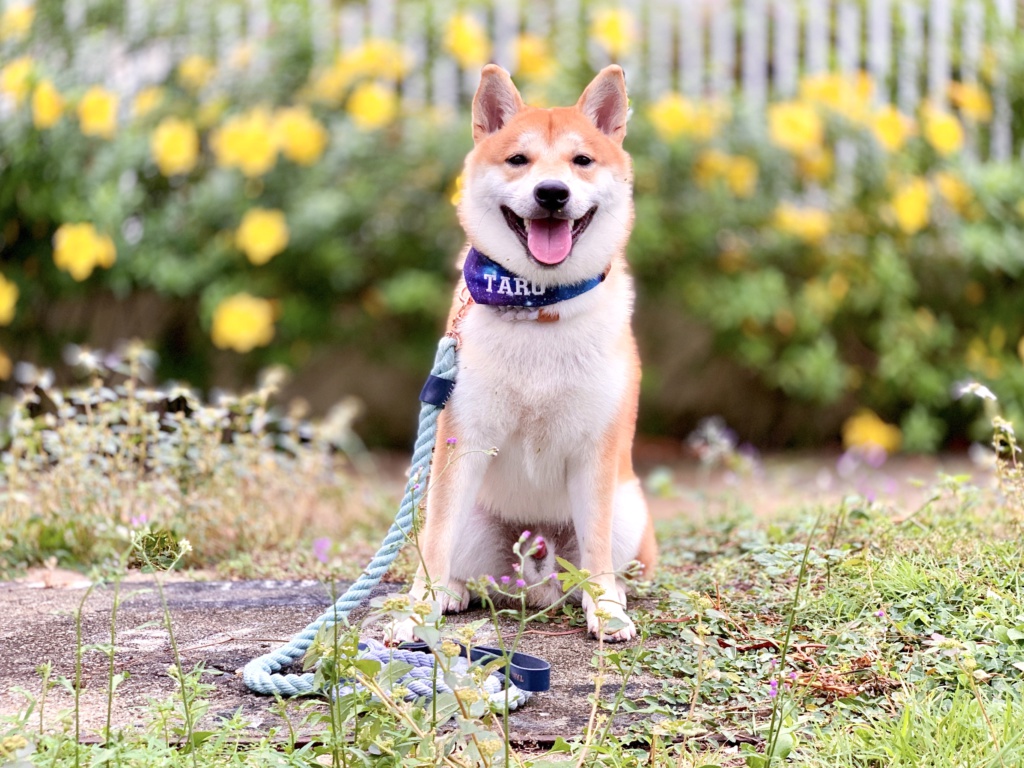
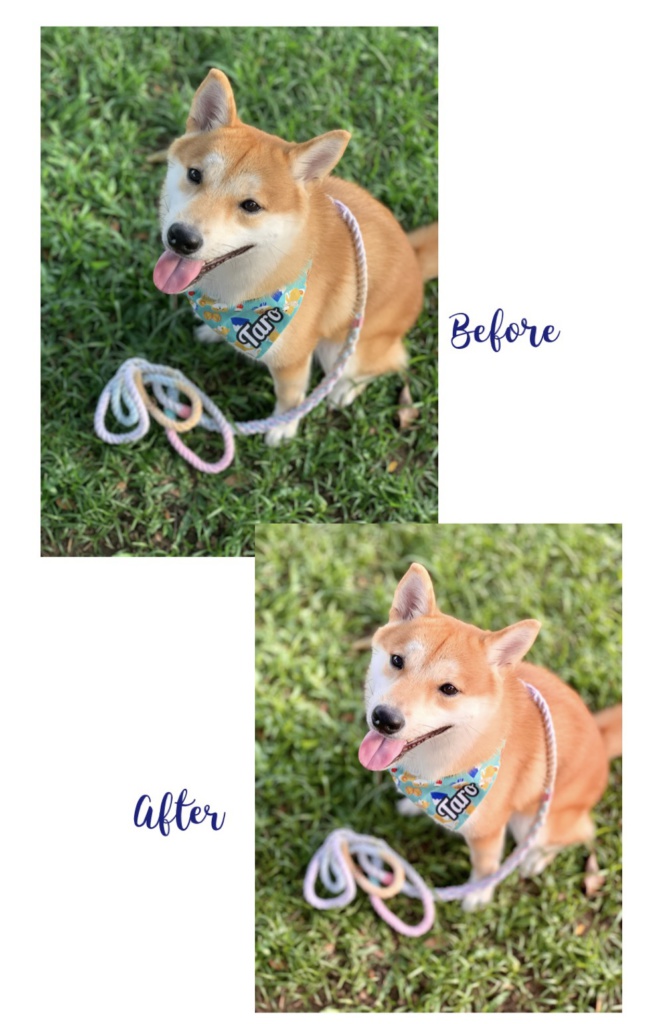
Legacy Collection

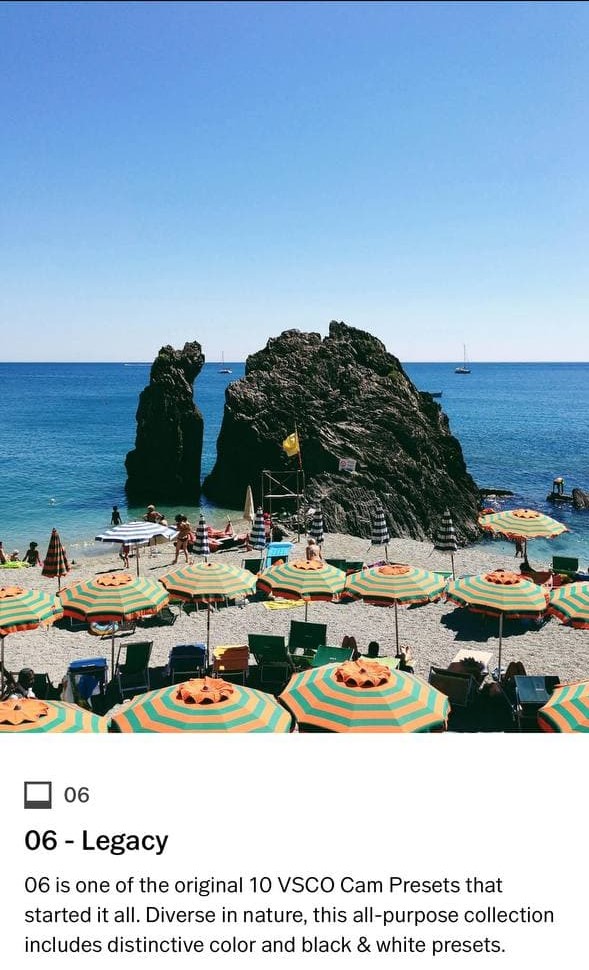
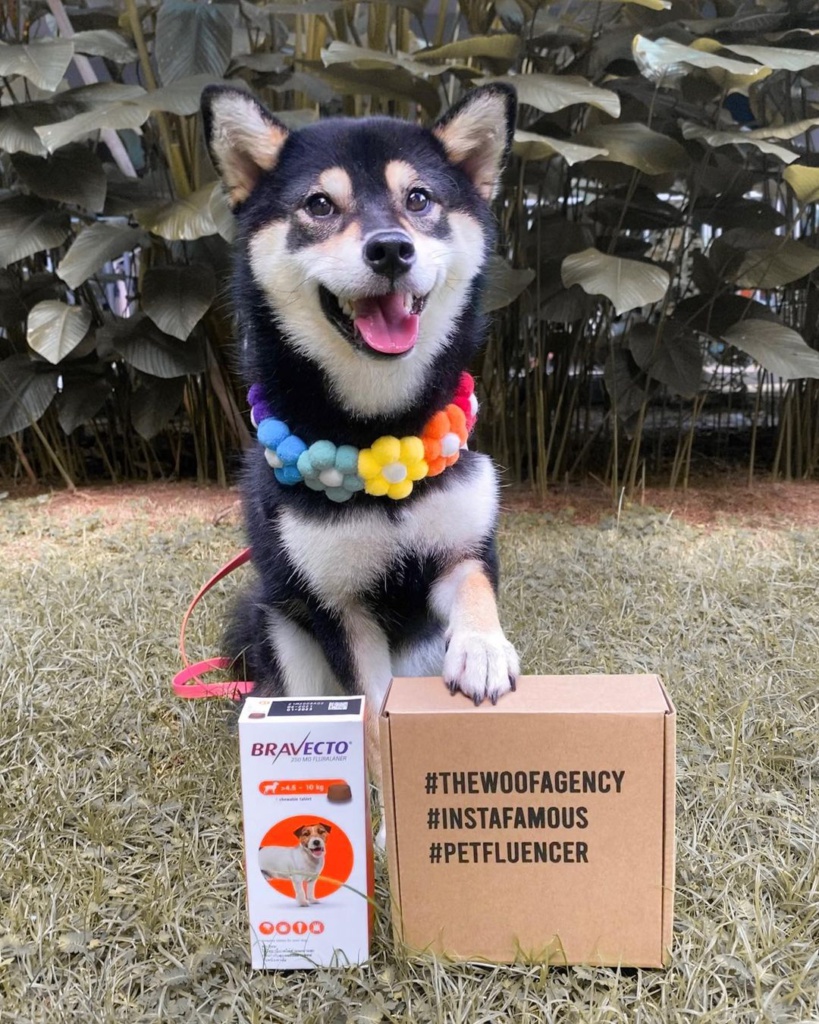
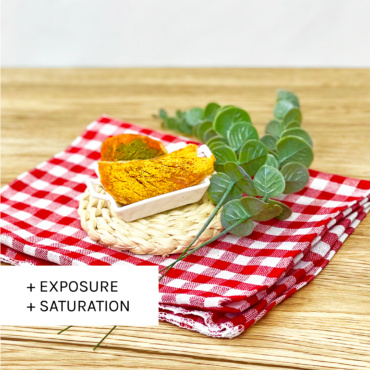
VSCO’s Legacy collection is a staple for the brand, being the original presets offered on the app. From black-and-white filters to washed-up colours, the Legacy collection has something for every occasion.

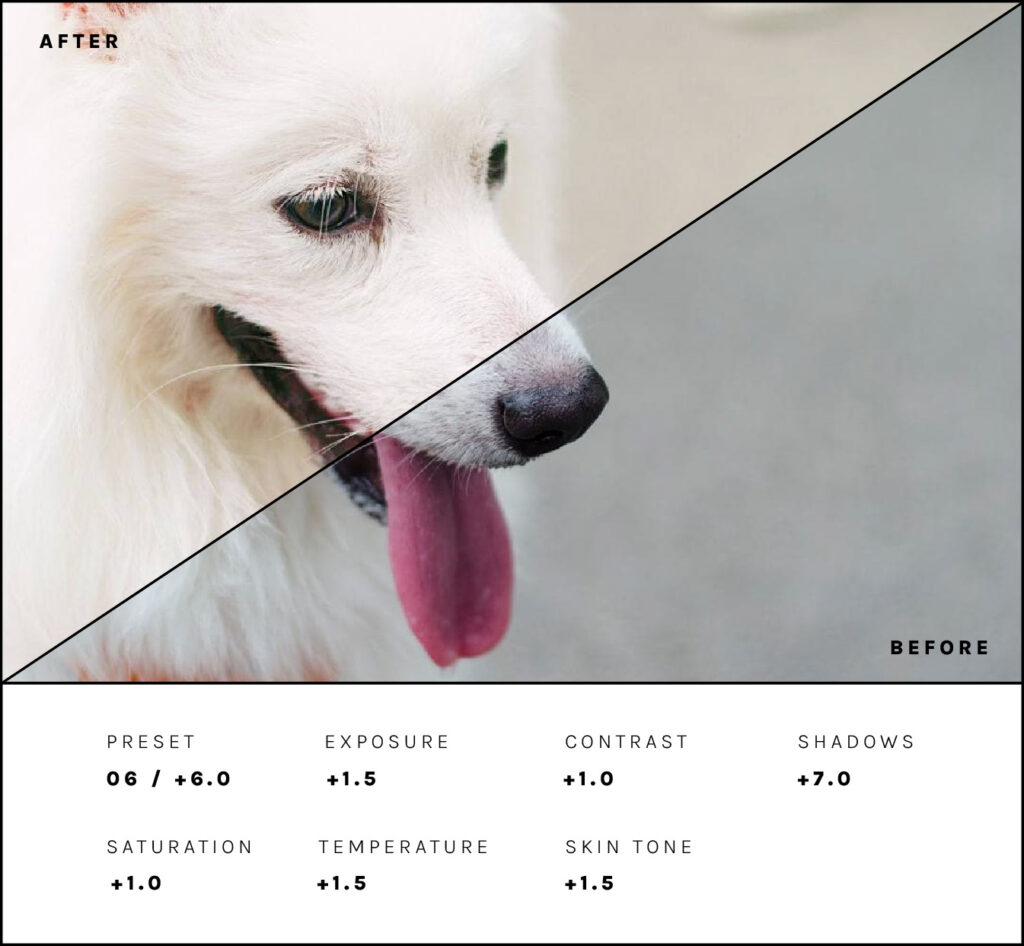
Because the floor behind ZaiZai is less detailed, there are fewer elements to take attention away from him. I reduced the shadows and increased the exposure to give his coat a softer appearance, rather than as individual strands of hair. The increased saturation and exposure also revealed ZaiZai’s chestnut-brown eyes, which were dull and hard to spot in the original.
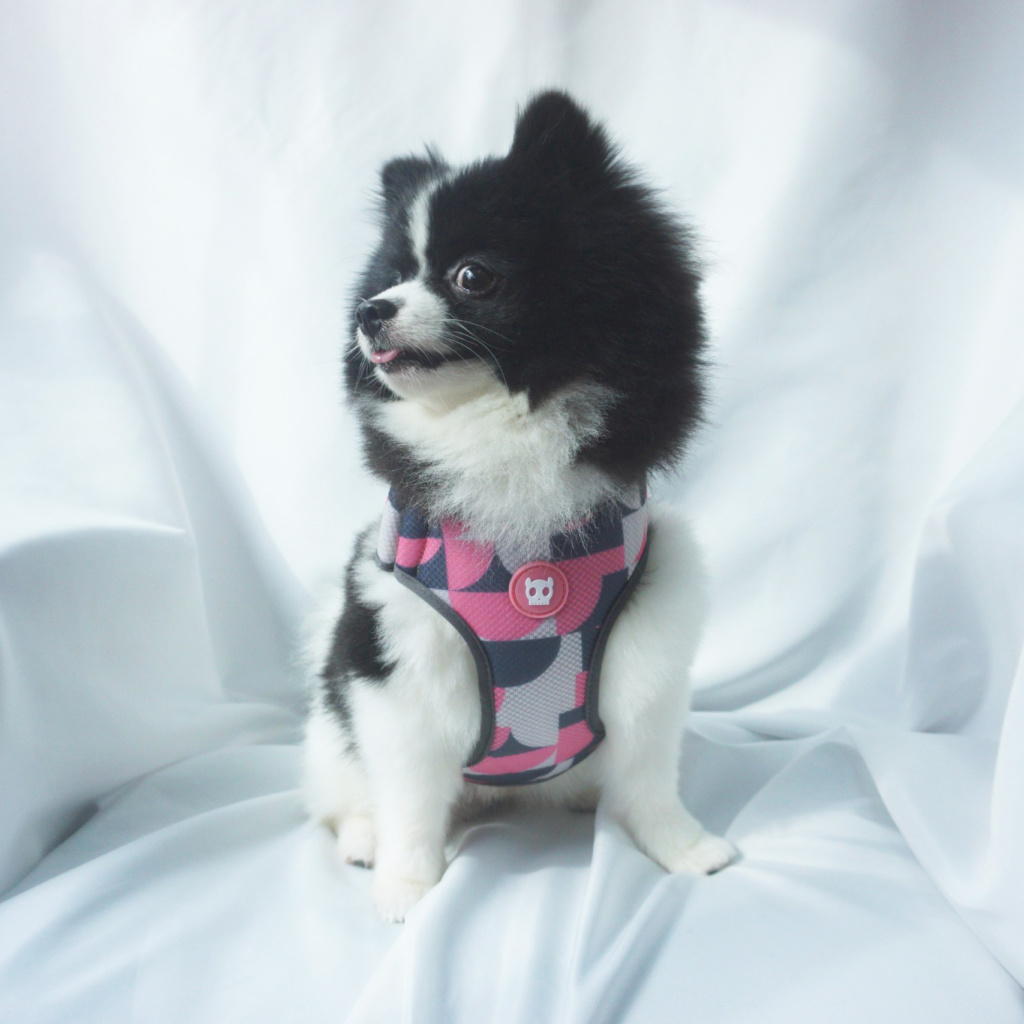
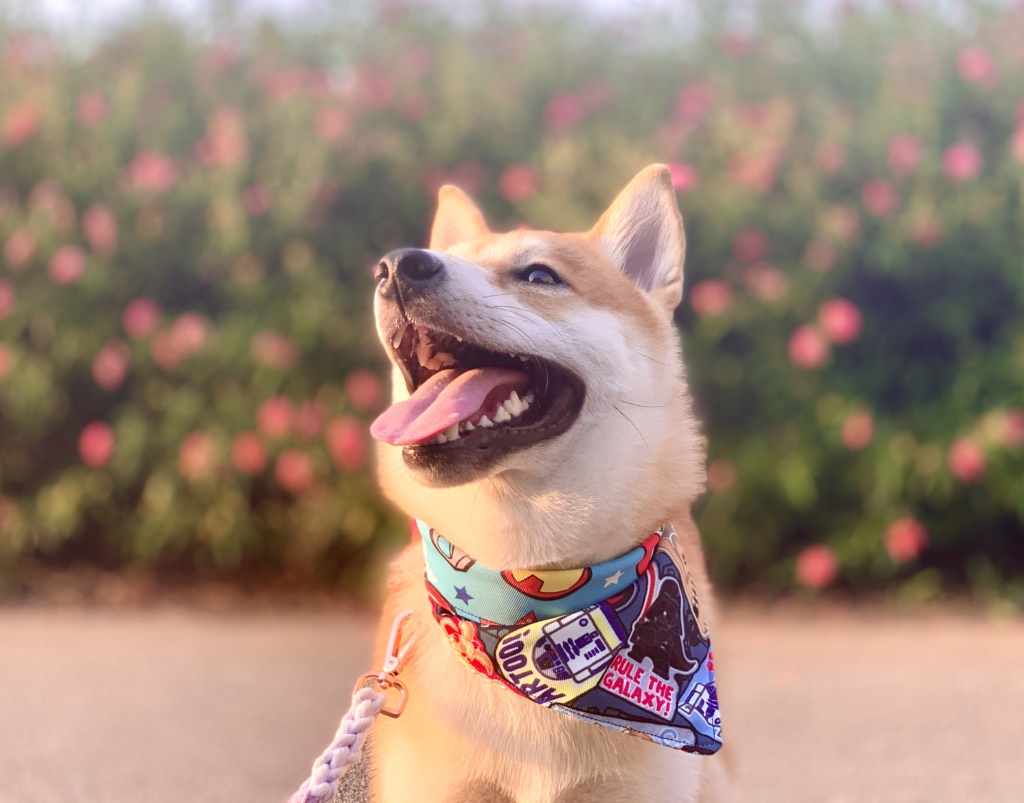
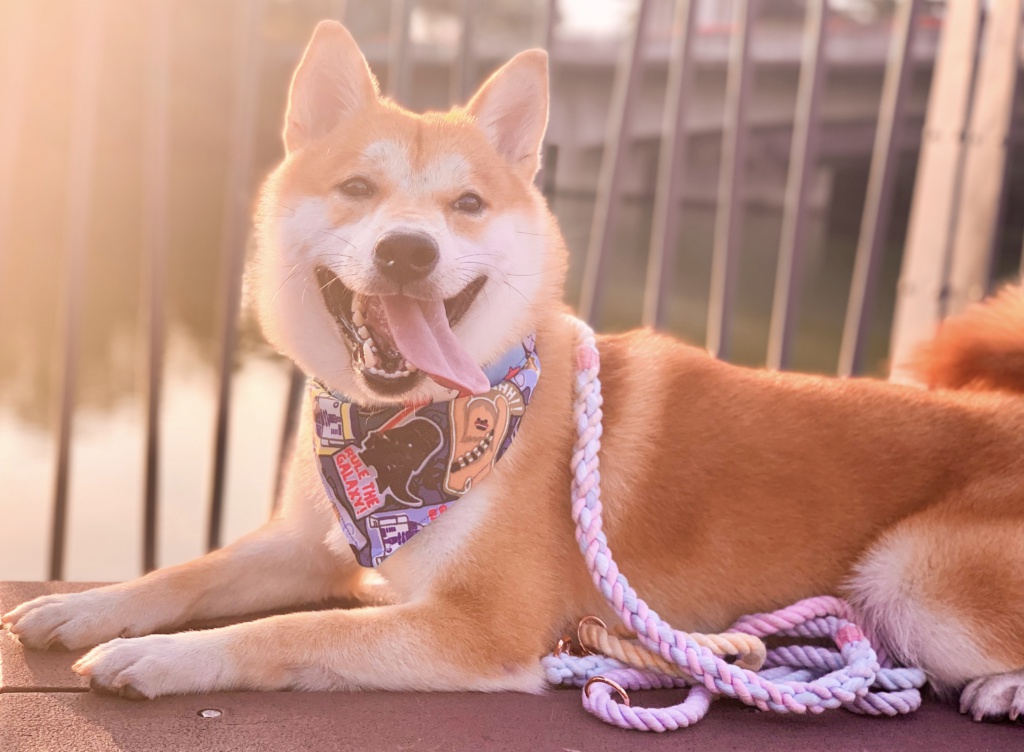
Isle of Dogs

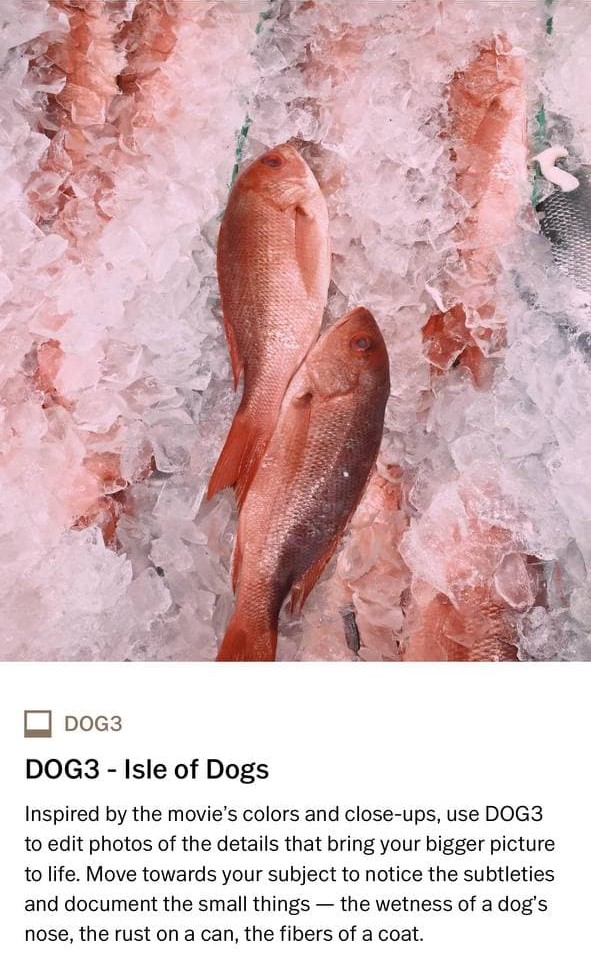
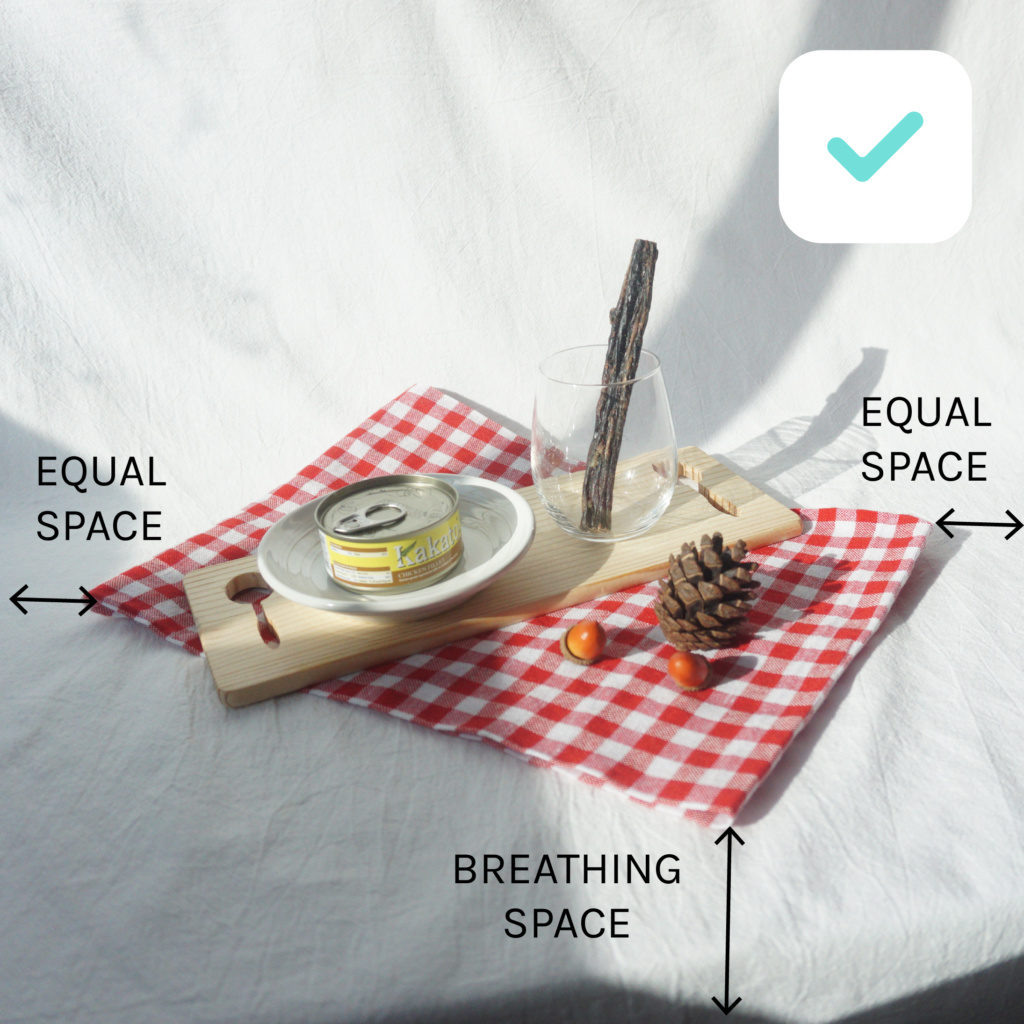
Wes Anderson’s iconic art direction in Isle of Dogs gave rise to a unique set of limited-time filters, each bringing out the rusty red-and-yellow world of Megasaki to your photos.

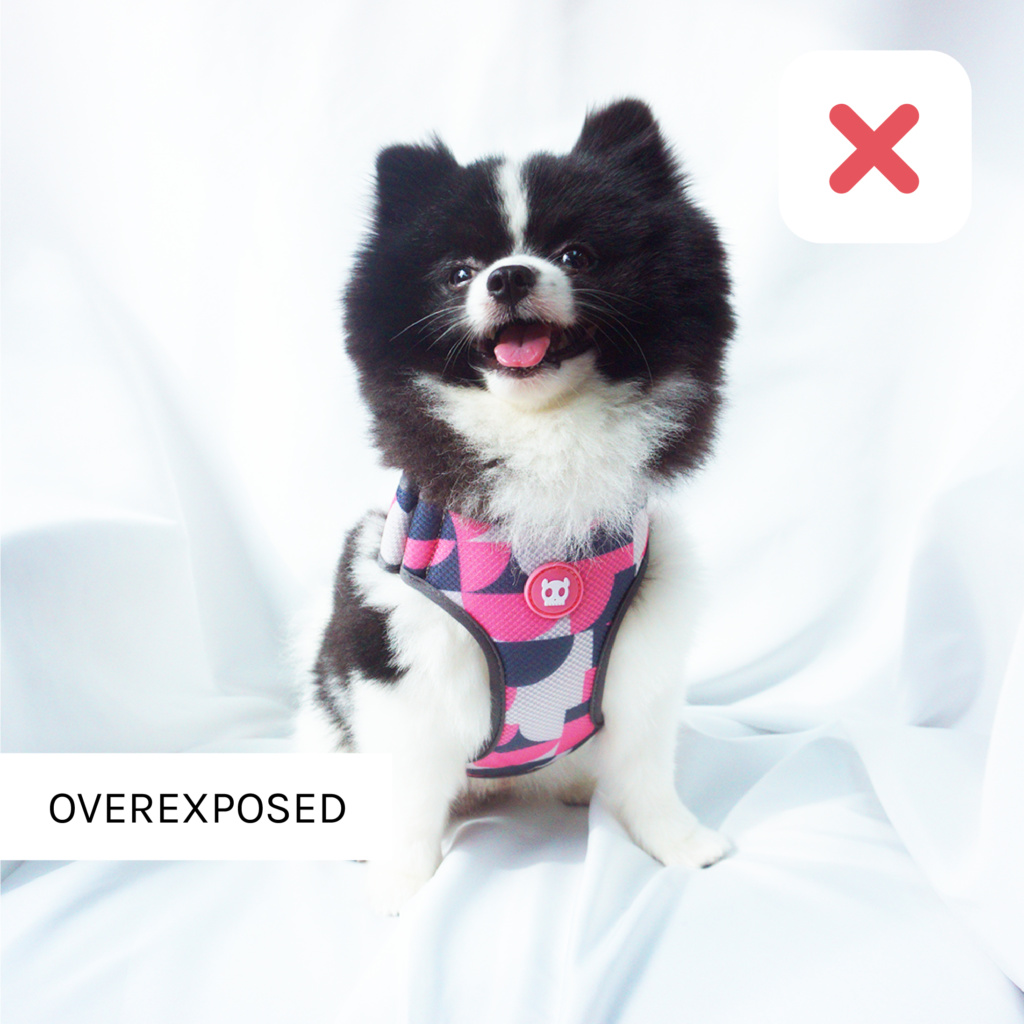
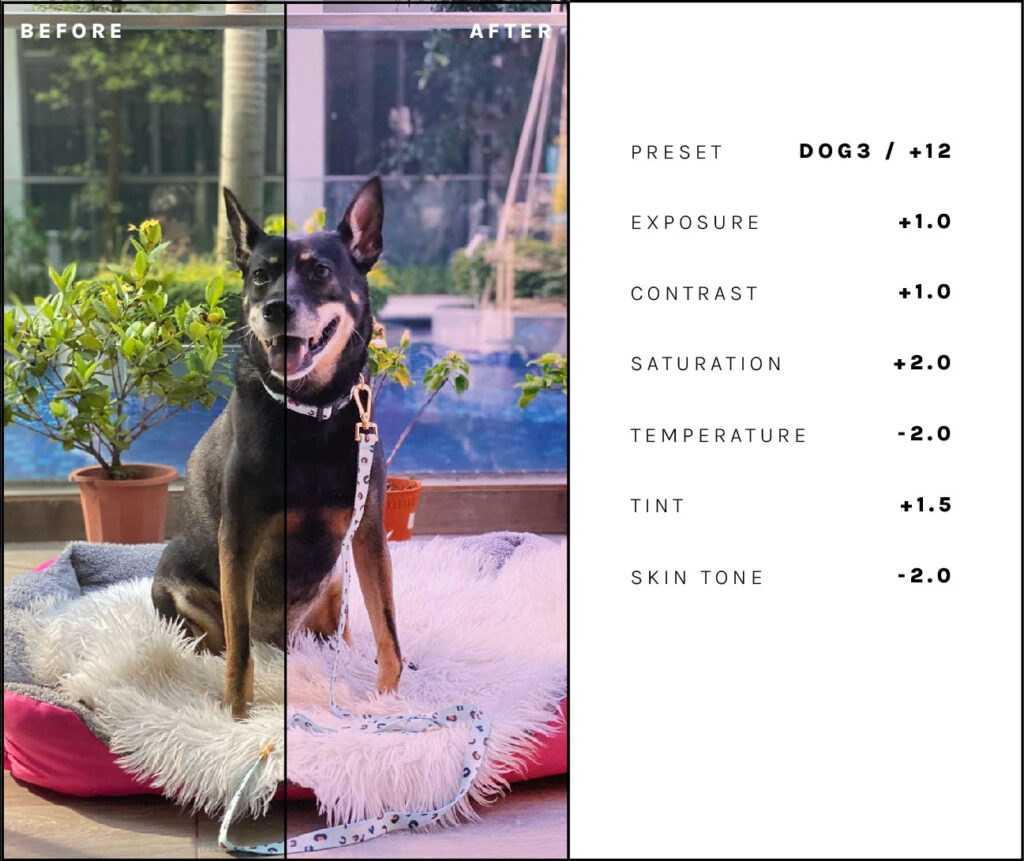
To give Kopi’s summertime fun more energy, I strengthened the blues of the pool and increased the tint to turn the greenish background closer to its original white colour. By overexposing the carpet, the details on the strands are lost so our eyes don’t wander below her leash.

Useful Links

VSCO has many other presets worth exploring, that will definitely help to beautify your already cute pawpals! Not very sure how to begin your pet photography journey? Check out these links below:

Categories
Community Stories Creator's Academy

Lights, Cameowra!

While everyone was looking at the wide-eyed, snow-coloured Scottish Fold x Ragdoll, Kyubi was looking at one thing — her pawrent and the eye of all Kyubi’s photos, Jane. The Temasek Polytechnic Graduate majored in Film and Television, and later refined her fundamentals in photography in part thanks to the influence of photography hobbyists among her friends and family.

Since adopting her in May of 2020, Jane and Kyubi have been sharing their photos ever since, amassing a huge following of 3.8k followers on Instagram. We thus invited her to share with us her photography techniques and tips for aspiring pet photographers

Jane’s 5 Essential Tools

  1. Camera and Lens

A good investment begins with a good camera. But as Jane states, a phone camera works just as well.

  1. Lighting

“Especially for indoor lighting,” Jane explains, “we use a few small, compact LED lights to illuminate the set, and a softbox to diffuse the light so that it doesn’t look too harsh on Kyubi.” In the case of animal photography, softboxes ensure that the light does not blind their eyes. As for how it looks in the frame, bright light constricts their pupils, causing them to appear small instead.

Jane recalled an incident where Kyubi’s eyes had become watery after one of their shoots. “I noticed that it was because the light was shining straight into her eyes. The glare was strong enough to make Kyubi uncomfortable.” It was through this trial-and-error and Jane understood the importance of a softbox.

  1. Backdrop

Contrary to popular belief, Jane and Kyubi do not work with huge backdrops. “I just work with whatever I have, be it brown bag paper or cloth,” she said, holding up what looks like a pink sheet of mahjong paper. “It all depends on the angle of the camera and how big your subject is. Making sure that it all fits into the frame.” 

Materials for backdrops can be found in Artfriend, Popular, or even Spotlight.

  1. Props

Jane advises against getting too many niche props, as they often end up as a one-use purchase. Instead, she recommends more generic props (e.g. flowers, fake candy, small figurines, etc.) to add value to the scene.

  1. Accessories

Accessories, wardrobe, and costume, to be exact. Beyond the usual accessories like bandana and bows, it is okay to purchase clothes specifically for thematic photoshoots.

Behind the Mind

When asked what goes into the conceptualisation of her shoots, Jane states that her shoots are usually to commemorate special days, or otherwise  inspired by the food she ate.

Spur of the moment

“One time I saw a sushi conveyor belt toy while browsing online and I was like, “I’ve got to get it. I have to do an Omakase-style photoshoot.””

Special Events

Jane : For our National Day photoshoot, we brought Kyubi to the iconic Dragon Playground at Toa Payoh just to take photos.

Improvise

Jane : We had a lottery themed photoshoot recently. For the scene, we collected a lot of lottery tickets from my grandmother and put it in a pile at the backdrop. For props, I made origami ribbons out of some tickets for Kyubi to wear. Sometimes you can just make do with everyday items from home.

Working with animals

When asked how Kyubi learned to be so well-behaved, Jane laughed. “From the first shoot to perhaps the fifth or sixth one, Kyubi’s attention span was rather short. After 2-3 mins of shooting, you can see that her temper would start to show. She will become very restless, and will want to escape or lie down.” 

Jane then emphasised that it’s only natural that these things happen when photographing pets. “Be patient with them and reward them with treats for behaving. I give Kyubi treats once she sits for the shoot. After a while, we would notice that Kyubi would automatically walk up to the backdrop whenever she sees us setting up for a shoot.”

Jane continues the interview with a warm smile as she talks about the support she feels brimming from Singapore’s pet owner and pet influencer community. “Everyone in the community is very close. I appreciate that pet owners share their daily stories… their experiences… sometimes just seeking help or giving recommendations about what’s out there in the market through their reviews. It’s through these social interactions that we can learn how to be better pet owners.”

Follow Jane and Kyubi on Instagram to see their latest shoots!

Categories
Creator's Academy

Top 5 Petfluencer Photography Tips

Starting your pet influencing journey?

As a pet influencer, there will always be times where you have to post a photo of your pet with a sponsored product. Instead of simply posting a still image of your pet with the pet product beside it, up your petfluencer game by varying pet poses and making it more dynamic!

Here are some of the simple yet effective ways to take fun shots of your pet with the product.

1. Catch that mlem

First, position your pet next to the product. Feed them a treat and snap multiple shots while they are engrossed in licking their lips. This is a great way to demonstrate how yummy the product is!

Designer Tip!: You can set your phone/camera mode to ‘Burst shots’ for fast and efficient photo capture and pick the best one.

Another easy trick is to dab some wet pet food onto the back of the product’s packaging and take a quick shot when your pet is in the midst of licking it.

2. Product Interaction

The product speaks best for itself when it is seen enjoyed by pets. Get some candid shots of your pet in the midst of eating or playing with the product for a genuine review.

3. Eyes on the Prize

One of the few basic ways to improve your photos is to capture eye contact!

Many underestimate the power of audience engagement when the pet makes eye contact with the camera. The easiest way is to call your pet’s name or any word that catches their attention, otherwise, simply hold a treat or a toy above the phone/camera.

4. Set the Stage

Taking photos in different locations can also refresh the look of your pictures.

Be it at the park, the streets or at home, do remember to make use of natural lighting for optimum photo quality. Ensure that the background is clutter-free and plain enough so that the focus would remain on your pet.

For food-related products: Fancy plating and props will definitely help spice up your pictures. If you don’t have many resources on hand, you can always experiment with your product’s arrangement to make them stand out from the ordinary.

5. Dress it Up!

Dressing your pet up for the occasion also helps to personalise and bring a touch of fun into the picture. This is also a good chance to finally show off all your fancy wardrobe collections!

Designer Tip!: Try to find costumes that best compliment the product. A little goes a long way when it comes to telling a story through your pictures.


Anyone can be a petfluencer – you don’t need professional skills or expensive props! Just remember our 5 simple tips:

  1. Catch that mlem!
  2. Interact with the product
  3. Capture eye contact
  4. Set the stage
  5. Try on costumes

Challenge yourself to make the most of what you have, as well as thinking out of the box!

Remember, the effort you put in your pictures are definitely recognised and appreciated by your followers and brands! So keep these tips in mind and have fun being a better petfluencer!

Categories
Creator's Academy

Top 5 Pet Product Photography Tips

1. Lighting

Good lighting is key to great photos.

For high contrast photos with stark shadows, opt for using direct sunlight. Cloudy days can also prove useful for softer yet natural lighting.

Otherwise, you might want to invest in a softbox light that is quite affordable online for more consistent lighting.

Do take note of reflection/glare from product packaging that will hinder its appearance.

Designer Tip!: Use a white sheet as a reflector to soften the light source or tilt the packaging at another angle where the light doesn’t hit it directly.

2. Mind your background!

The background of the picture is another essential aspect that will differentiate your picture from an impromptu everyday photo or a more professional one. It is also an easy one to change!

All you need is some large paper taped to the wall for an easy studio-style photo. Plain cloths or rugs are fine as well.

Designer Tip!: Take your photos next to the window for the best results with natural lighting!

3. Props, props, props!

Props can help push the concept of the product and its function while making it more aesthetically pleasing.

Props don’t have to be specially bought – things found around the house works as well! Just gather whatever you can think of that is related to the product and layer them over each other for extra depth for the image.

For Pet Food products, opt to display them alongside tea towels, metal grills, chopping boards, pet bowls, fancy saucers and cutlery.

For Pet Hygiene Products, you can place them alongside towel, sponge, soap suds, shower cap and even a rubber duck!

Designer Tip!: Dried or fresh flowers or fake foliage can be used as extra fillers.

4. Dealing with unappetising Pet Food

Pet food is not necessarily the most attractive thing to photograph but worry not.

The best way to present pet food is to showcase the actual size and texture of the product. This can be decorated via creative plating where the pet food is arranged into fun shapes by freezing them in moulds. You can even mix a few different products together for the variation in colour and texture.

Another way is to place the pet food on a fancy or colourful plate to compensate for the dull colour of the food itself. Smaller portions can also be placed on a wooden spoon or small saucers for a stronger focus.

Ideally, relevant fresh ingredients or spice bottles can be included in the background to inform viewers more about what the food is made of.

Designer Tip!: Try to stick to warm appetising colours like wood brown, yellow and orange.

5. Most importantly, include a pet!

Close-ups of products and food will definitely give viewers the best view of the products.

Nonetheless, including a pet that enjoys the product will personalise and bring credibility to it.

Pets are more engaging than a motionless product, especially for pet accessories that require a real-life model for maximum visualisation of the product.

Designer Tip!: You don’t have to include the whole pet – even elements of pets like a paw peeping from the side can make the photo more interesting.

Stay tuned for our next article with more tips on how to take better pictures of your pet with products!

Categories
Creator's Academy

Top 5 Photo Editing Tips

Our in-house designers are in charge of taking our beautiful newsletter photos. They work hard around the clock to ensure our pictures are of the highest quality.

Taking photos outdoors, or of your pet can be a tricky one. We don’t have the liberty of knowing when the sun will rise, or if your pet will stay still throughout the duration of the photoshoot. Check out their tips on photo editing that are guaranteed to help you achieve the best photos possible. 

Let us know in the comments if any of these helped!


Designer Tip!:  You don’t have to use professional paid programs or have the know-how of a photographer to get nice photos. Simply use free apps like VSCO and tweak the adjustments accordingly to make your grid have a consistent look.

1. Crop for Better Composition

It is always a good habit to crop images to improve photo composition. Follow the rule of thirds or centralise the subject and ensure that there is an even amount of breathing space around the edges.

Cropping can also come in handy to remove any unsightly object in the background.

Designer Tip!: As a general rule, avoid cropping right at the edge of an object – either leave some space or crop beyond the edge.

2. Increase Exposure

If your picture isn’t taken under direct, maximum sunlight, chances are that you will need to brighten it. For a better sense of how bright it needs to be, visualise it against your social media feed. Imagine it placed against a white background and determine if it looks dull in comparison.

Designer Tip!: Do note that if more than 10% of the picture is pure white, increasing the image’s exposure may result in it appearing too bright, a.k.a overexposed.

3. Increase Saturation

To make your pictures more colourful and bold, it is advisable to increase saturation for that pop of colour. Especially for food-related posts where stronger coloured food can look more appetising.

4. Adjusting Temperature

We tend to easily overlook the temperature of a photo. Yet, it is important in maintaining the image’s balance. For example, if the photo is too warm (orange tones) or too cool (blue tones), it may look off-kilter. Simply adjust it back closer to the neutral white tone to provide a clearer and cleaner appearance.

Designer Tip!: Of course, if you prefer having a cool/warm undertone for your photos, you should opt for a preset instead of adjusting the temperature directly.

5. Make Use of Presets

Presets are here to make your life easier. Different presets accentuate different colours in the photo that makes it more aesthetically pleasing – so if you are going for a warmer feel, get the ones that have a rose or orange tinge. Simply browse the few free ones available in the app and see which ones are to your liking.

Photo Credit: Instagram @_missygigi_

Designer Tip!: You can also copy pre-loved edits and paste them to your other photos for fuss-free consistent editing!


What do you think? Have you tried any of these tips before on your photos? Let us know if it works, or if they helped you gain a better understanding of how to improve the quality of your photos. 

We wish you all the best!

Categories
Creator's Academy

Top 5 Phone Photography Tips

Hey there petfluencers, struggling to take nice photos?

Our in-house designers are here to help! Besides coming up with beautiful graphics, they also take excellent photos of our office pets for promotional and marketing purposes.

Not everyone has the luxury to own a camera, hence our designers have compiled a list of useful tips for you when it comes to phone photography. From getting the best composition to locating free and great sources of light- read on to find how you can improve the quality of your photos!

Let us know if you try them out!


No camera? No problem! With the advancement of technology these days, you too can take amazing photos with just your smartphone. Here are a few basic yet essential tips to start you off on your photography journey!

1. Use Sunlight!

Artificial Light Vs…

… Sunlight!!

Natural sunlight is the best source of lighting for photos, the only drawback is its inconsistency throughout the times of the day. Nonetheless, it is still the most important and easy factor to enhance your photography. Lighting determines the brightness/darkness, tone, mood and atmosphere of the photos you take. Use the sunlight to your advantage for the best ambience.

Designer Tip!: Light from behind the camera pointing directly on the subject will give flat lighting and cause a shadow to fall in the background. Using lighting from the side will produce a more interesting effect on the images taken.

P.S Try taking your photos during Golden Hour, commonly occurring around 5pm!

2. Composition Using Gridlines

Composition is another basic and essential aspect of photography.

Utilise your mobile phone camera’s gridlines that can help you to balance or centralise your shots. An easy guide would be to follow the Rule of Thirds; where an image is divided into three parts both horizontally and vertically via two lines each.

Designer Tip!: Placing the subject at any of the areas along the lines would generally achieve a balanced look, especially the sections where the lines intersect.

3. Take Note of Negative Space

Negative spaces refers to the area in the picture that is not the subject.

Subject should not be taking up all the space in the photo. Be generous with the negative space around the subject to help the subject stand out more. It will also help to provide breathing room for the viewer.

4. Play with Different Perspectives

The most common angles to take a photo are from the top or from the front. Maximise your angle to add variety to your photos. Each perspective has their own merits and styles, so have fun experimenting which works better for the particular subject.

Do you prefer to take your photos top down in a 2D Flatlay position…

… or with a 3D Front View?

Designer Tip!: You can add depth by having objects in front or behind the subject that will give the viewer a sense of spatial awareness within the picture.

5. Lastly, Remember to Edit your Photos!

The truth about photography is that most things just don’t look that good in real life. There’s where photo editing comes in handy. Many people underestimate the power of photo edits – even the most basic edits like cropping and brightening can turn a bad photo into a good one!

With a smartphone, edits are made easier with the help of several simple and free apps. Sometimes, you may even just edit the photograph on Instagram itself and it seriously makes such a big difference!


Stay tuned to our next article for more photo editing tips!

Let us know in the comments which tip you liked best!

Categories
Community Stories

Tips for taking memorable outdoor photos of your furkid (without using professional cameras!)

Our personal experience

We often receive queries from fellow pawrents who ask us where we take our outdoor photos, what camera we use, and how we managed to get clear and bright photos of Taro! While we are by no means professional photographers (PS. in fact, we snap most of our pictures with our iPhone!), we would love to share some tips on how to get some memorable and clear photos for you to keep (or post on IG!)

Photo snapped using iPhone 🙂

1. Is your doggo in a calm mood?

This is an important point often overlooked by most pawrents! There is no way you can snap a nice clear photo if your dog is in an overly-playful mood and is constantly breaking his/her sit-stay position. Tips – we usually start our photoshoot sessions by taking Taro for a long walk or letting him interact with other dogs. After the walk, Taro will be calmer and tend to stay better – more time for hoomans to snap photos!

Photo taken after a long walk with Taro.

2. Avoid crowded photo spots

This goes without saying – it is difficult for most dogs to stay focused when there are tons of people and dogs walking past. Furthermore, most people would prefer photos where there are as little photobombs as possible. We like to bring Taro to spots in a park where there are fewer people walking by – other than your doggo being less distracted, you also get to snap more photos in peace without feeling too conscious of yourself squatting in front of your dog with your phone for too long a period of time >.< Places, where there is plenty of room for walking and photoshoots, include Bishan Park (huge park, you can definitely find less crowded spots!), East Coast Park, and Lower Seletar Reservoir.

Photo taken at East Coast Park

3. Take advantage of the (good) weather

We love taking photos around 5 to 6.30pm. This gives you a good chance of taking sunset photos, and we try to avoid gloomy days because the surroundings can differ so much with some sunshine. Below are some sunset photos that we really love – disclaimer: they are definitely a stone’s throw from professionally-taken photos, but good enough for our own keepsake 🙂 Bonus – they are ALL taken with iPhone only. We love snapping photos on the go without carrying heavy cameras.

4. Make use of some blooms

This is up to your personal preference, but we love having blooms in our photos! If you use aperture on your camera or portrait mode on your iPhone, you can actually achieve some nice effects with a random flower bush.

5. Can’t get your furkid to stay still? Try putting them on a bench 🙂

Not all dogs are pawfect at sit-stay, and on certain days they are extra distracted! Sometimes, we love to make use of that random park bench to snap some photos 😉

Botanic Gardens
Sengkang Riverside Park

6. Basic Editing – simply use your phone photo-editing app or Lightroom

We usually do some basic editing of our photos – no complicated or paid app or Photoshop, we do it only using our iPhone photo app editing functions and Lightroom. There are many ways of editing a photo and different people have different preferences, so there is no right or wrong to this! For our own photos, we like them bright and vibrant. We would usually adjust the brightness and color of the photos slightly. Lightroom does this pretty well without making your photos look over-exposed or unnatural.

Places we love to go

Our frequently visited places for walks and photos are – Punggol Waterway Park and Sengkang Riverside Park (these parks can be pretty crowded though, but they are near to us), East Coast Park, Bishan Park, and a new favorite Lower Seletar Reservoir. We also love Botanic Gardens and Gardens by the Bay but they are a little further for us. Share with us your favorite places for photoshoots/walks below! And thank you for reading! We hope this article helps pawrents without professional cameras to take nice and memorable photos of their furkids for keepsake 🙂